


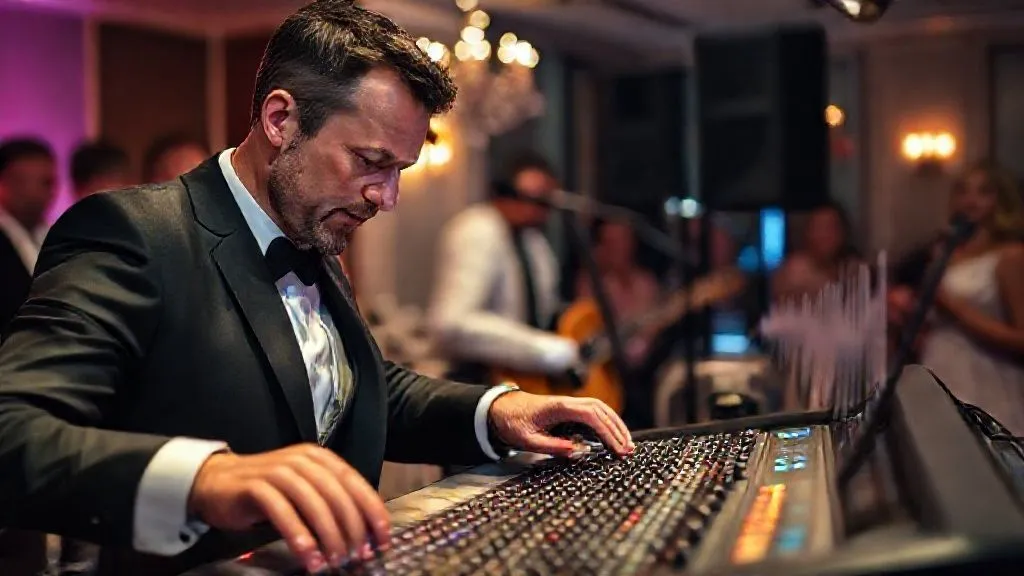
How to Troubleshoot Live Wedding Music Feedback Issues?
For over two decades, I've had the immense privilege of orchestrating the sonic backdrop for countless wedding celebrations. I've witnessed the pure joy of a perfectly delivered first dance song and the magic of heartfelt vows amplified with crystal clarity. But I've also been in the trenches, heart pounding, as that dreaded, piercing squeal of acoustic feedback threatens to shatter a pristine moment. It’s an experience no couple, no guest, and certainly no sound professional ever wants to endure.
Acoustic feedback isn't just an annoying noise; it's a breakdown in the delicate balance of live sound, capable of derailing the most meticulously planned musical performance. It can turn a cherished memory into an uncomfortable cringe, leaving performers flustered and guests covering their ears. It’s a common, yet often preventable, antagonist in the world of live wedding music.
In this definitive guide, I'll draw upon my extensive experience to provide you with a comprehensive framework for understanding, preventing, and, most importantly, swiftly resolving live wedding music feedback issues. We'll delve into actionable strategies, expert insights, and real-world scenarios to equip you with the knowledge to ensure your wedding's soundtrack is nothing short of flawless.

The Science of the Squeal: Understanding Acoustic Feedback
Before we can effectively troubleshoot, we must first understand what acoustic feedback is and why it occurs. Simply put, feedback is a self-sustaining loop of sound. It happens when the sound from a loudspeaker is picked up by a microphone that is feeding into the same loudspeaker, gets amplified, sent back out, and picked up again. This cycle rapidly escalates, creating that familiar, unpleasant howl or screech.
Think of it like this: if you hold a smartphone too close to a speaker while on a call, you’ll hear an echo. Feedback is an extreme, uncontrolled version of that echo, amplified exponentially. It's a fundamental challenge in live sound, and understanding its root cause is the first step in prevention.
Key Components of the Feedback Loop
- Microphone: The initial input device, sensitive to sound waves.
- Amplifier: Boosts the microphone's signal.
- Speaker: Converts the amplified electrical signal back into sound waves.
- Room Acoustics: The environment itself, with its reflective and absorptive surfaces, plays a crucial role in how sound propagates and bounces back.
Feedback is not just a nuisance; it's a signal that your sound system is fighting itself. It means the system is reproducing its own output, leading to an uncontrolled oscillation that can damage equipment and certainly ruin the ambiance.
Pre-Wedding Sound Check: Your First Line of Defense
In my experience, 90% of feedback issues can be mitigated, if not entirely avoided, with a thorough and systematic pre-wedding sound check. This isn't just about making sure the microphones are on; it's about meticulously testing every component in the actual performance environment. It’s the single most important proactive measure you can take to prevent the dreaded squeal.
A Systematic Approach to Sound Check
- Arrive Early and Assess the Venue: Before any equipment is set up, take a walk around the space. Note reflective surfaces (glass, hard walls), absorbent areas (curtains, soft furnishings), and potential audience positions. Visualize sound paths.
- Test Each Component Individually: Don't just turn everything on at once. Bring up each microphone, instrument, and playback source one by one. Listen for clarity, hums, or early signs of feedback at various volume levels.
- Communicate with Performers: Have the wedding band or musicians perform a brief segment at their typical volume. This allows you to set gain levels and identify potential feedback points under realistic conditions.
- Walk the Room with a Critical Ear: Move through the entire audience area, listening for dead spots, overly loud areas, and any frequencies that seem to resonate unpleasantly. This helps identify areas where feedback might develop later.
| Task | Status | Notes |
|---|---|---|
| Venue Assessment | Done | Checked for reflective surfaces, power access. |
| Microphone Test (Each) | Done | Gain staging, clarity, initial feedback points. |
| Instrument Test (Each) | Done | Input levels, EQ settings, monitor mixes. |
| Speaker Placement Check | Done | Angles, elevation, coverage zones. |
| Full Band Run-Through | Done | Dynamic range, overall mix, final feedback sweep. |
| Room Walk-Through | Done | Audience perspective, volume consistency. |
Microphone Mastery: Placement and Polar Patterns
The microphone is often the patient zero of feedback issues. Its sensitivity and placement are critical. A microphone too close to a speaker, or improperly aimed, is an open invitation for feedback. Understanding how different microphones 'hear' sound is paramount to preventing problems.
Optimal Microphone Positioning
- Maintain Distance from Speakers: This is the golden rule. The further a microphone is from a speaker, the less likely it is to pick up its own amplified signal. This applies to both main PA speakers and stage monitors.
- Angle Away from Speakers: If distance is limited, angle the microphone's 'dead spot' (the area where it's least sensitive) towards the speakers. This is where understanding polar patterns becomes vital.
- Avoid Reflective Surfaces: Hard surfaces like walls, floors, and even music stands can reflect sound back into the microphone, creating unwanted resonance and increasing the likelihood of feedback. Position mics to minimize these reflections.
Understanding Polar Patterns
Microphones have different polar patterns, which describe their sensitivity to sound from different directions. For live wedding music, cardioid and supercardioid microphones are your best friends:
- Cardioid: Most sensitive to sound directly in front, rejecting sound from the sides and significantly from the rear. Ideal for vocals and instruments where you want to isolate the sound source.
- Supercardioid/Hypercardioid: Even more directional than cardioid, with excellent rejection from the sides, but with a small lobe of sensitivity directly behind the microphone. This requires careful positioning, especially with stage monitors.
Choosing the right mic for the job and placing it correctly, leveraging its polar pattern, is a powerful strategy to prevent feedback. As Shure, a leader in audio technology, often emphasizes, proper microphone technique is fundamental to a clear sound.

Speaker Savvy: Strategic Positioning for Clarity
Just as critical as microphone placement is the strategic positioning of your loudspeakers. Speakers are designed to project sound, and if that projected sound finds its way back into an open microphone, feedback is inevitable. How you deploy your PA (Public Address) and monitor speakers will significantly impact your ability to control the sound and prevent feedback.
Main PA Speaker Placement
- Place Speakers in Front of the Stage/Performance Area: This is a non-negotiable rule for preventing feedback. The main speakers should always be positioned in front of the microphones, aiming out towards the audience. This minimizes the chance of sound from the speakers being picked up by the mics.
- Angle Speakers Outwards (Splay): Instead of pointing them straight ahead, angle your main PA speakers slightly outwards. This helps cover a wider audience area and reduces the amount of direct sound hitting back walls, which could reflect into microphones.
- Elevate Speakers: Get your speakers up on stands or flown. Sound travels better over obstacles (like people's heads) and by elevating them, you reduce early reflections off the floor and increase direct sound to the audience, minimizing the need for excessive volume.
Monitor Speaker Placement (Wedges)
Monitor speakers (often called 'wedges') are for the performers to hear themselves. They present a unique feedback challenge because they are, by definition, close to the microphones. The key is to place them strategically:
- Behind the Microphones: For cardioid mics, place the monitors directly behind the microphone, aimed at the performer. This utilizes the microphone's null point (its least sensitive area) to reject the monitor sound.
- Utilize Supercardioid Nulls: If using supercardioid mics, remember their rear lobe of sensitivity. Place monitors slightly off-axis from directly behind the mic, using the microphone's side rejection points.
Your speakers aren't just broadcasting sound; they're directing it. Poor direction equals poor sound, and often, an uncontrolled feedback loop. Every speaker placement decision should be made with feedback prevention in mind.

The Mixer's Magic: EQ and Gain Staging
The audio mixer is your command center for sound. Proper gain staging and intelligent use of equalization (EQ) are powerful tools to prevent and mitigate feedback. These aren't just about making things louder; they're about optimizing signal flow and sculpting frequencies to achieve clarity and avoid unwanted noise.
Proper Gain Staging
Gain staging refers to setting the optimal input and output levels at each stage of your audio signal chain. Incorrect gain staging is a leading cause of both feedback and poor sound quality. Too much gain too early in the chain means you’re amplifying noise and increasing the risk of feedback.
- Set Input Gain (Preamp): This is the most critical step. With the channel fader at unity (0 dB) and the master fader low, slowly bring up the input gain until the signal peaks appropriately (usually around -6 to -3 dB on the meter). You want a strong, clean signal without clipping.
- Adjust Channel Faders: Once input gains are set, use the channel faders to balance the mix between instruments and vocals.
- Master Output: Finally, use the master fader to control the overall volume for the audience.
EQ for Feedback Suppression
Equalization allows you to boost or cut specific frequencies. Feedback often occurs at particular resonant frequencies within a room or system. Your EQ is your surgical tool to address these problem frequencies.
- Parametric EQ: Found on most digital mixers and some analog ones, this allows you to select a specific frequency, adjust its bandwidth (Q), and then cut or boost it. This is ideal for 'ringing out' a room – identifying and cutting specific feedback frequencies.
- Graphic EQ: Offers a set number of fixed frequency bands (e.g., 31-band EQ). While less precise than parametric, it's good for broader frequency adjustments and can be used to 'notch out' problem frequencies.
Case Study: The Harmony Band at Sunset Meadow
I recall a wedding at the 'Sunset Meadow Venue' where a lively six-piece band, The Harmony Band, was struggling with persistent feedback, particularly from the lead singer's microphone. The sound engineer on duty, a talented but less experienced individual, was simply lowering the master volume, which made the band barely audible. I stepped in and observed their gain staging was too high on the vocal mic, causing the preamps to push too much signal. By implementing proper gain staging – reducing the input gain to a healthy level and then using the channel fader to bring up the volume – we immediately gained more headroom. Then, using the parametric EQ on the mixer, I performed a quick 'feedback sweep,' slowly boosting frequencies until one started to ring, then sharply cutting that specific frequency. Within minutes, the piercing feedback was gone, allowing The Harmony Band to perform with full volume and clarity, much to the relief of the couple and their guests. This resulted in a seamless, high-energy performance that everyone remembered for the right reasons.
For a deeper dive into gain staging, I highly recommend resources like Sweetwater's comprehensive guides on audio engineering.
Cabling & Connections: The Often Overlooked Culprit
It's easy to focus on the big components like microphones, speakers, and mixers, but the humble cables and connectors are often silent saboteurs. Faulty, damaged, or improperly connected cables can introduce hums, crackles, intermittent signals, and even contribute to feedback by creating ground loops or signal degradation. Always remember that your sound system is only as strong as its weakest link.
Best Practices for Cabling
- Use High-Quality, Shielded Cables: Invest in good quality XLR and instrument cables. Shielding protects the signal from electromagnetic interference, which can cause hums and noise.
- Inspect Cables Regularly: Before and after every event, check cables for cuts, frayed wires, bent pins, or loose connections. A damaged cable is a ticking time bomb for your sound.
- Secure Connections: Ensure all cables are fully plugged in and locked (if applicable). Loose connections are a prime source of intermittent audio and unexpected noise.
- Avoid Excessive Cable Length: While sometimes unavoidable, use the shortest practical cable length. Longer cables are more susceptible to interference and signal degradation.
- Manage Cable Runs: Keep audio cables separate from power cables to prevent induced hums. Use cable ties or Velcro straps to keep runs neat and prevent tripping hazards or accidental disconnections.
- Understand Ground Lifts: If you encounter a persistent hum, especially when connecting different pieces of equipment, it might be a ground loop. A ground lift (often a switch on DI boxes or some amplifiers) can break this loop, but use it judiciously and understand its implications for safety.
Proper cable management and maintenance are foundational to a reliable and feedback-free sound system. A clean signal path starts with clean connections.
Environmental Factors: Acoustics and Room Dynamics
The performance space itself is a critical, and often unchangeable, component of your sound system. Every room has its own acoustic signature, and understanding how sound behaves within that environment is crucial for managing feedback. A beautiful ballroom with high ceilings and hard surfaces will present different challenges than a carpeted tent or an open-air garden.
Dealing with Difficult Venues
Some venues are acoustically challenging, characterized by excessive reverberation, slap-back echoes, or standing waves that can amplify certain frequencies and trigger feedback. While you can't redesign the venue, you can adapt your setup.
- Strategic Draping and Soft Furnishings: If possible, utilize heavy drapes, carpets, or even strategically placed soft furniture to absorb sound reflections. At many wedding venues, these elements are already present and can be leveraged.
- The Audience as an Absorber: Remember that a room full of people will absorb a significant amount of sound. A sound check in an empty room will always sound brighter and more prone to feedback than during the actual event. Plan for this by not over-EQing or over-cutting frequencies in an empty room.
- Microphone Choice and Pattern Adjustment: In highly reflective rooms, highly directional microphones (supercardioid or hypercardioid) can be particularly effective at rejecting unwanted room reflections and focusing on the sound source.
- Distributed Sound Systems: For very large or oddly shaped venues, consider using multiple smaller speakers strategically placed throughout the room, rather than blasting sound from two large speakers at the front. This reduces the overall volume needed from any single speaker and can improve clarity while reducing feedback potential.
Understanding and adapting to the acoustics of a wedding venue is a hallmark of an experienced sound professional. For more insights on room acoustics, explore resources from the Audio Engineering Society.
The Emergency Toolkit: Quick Fixes When Disaster Strikes
Even with the most meticulous planning, feedback can sometimes rear its ugly head mid-performance. When 'How to troubleshoot live wedding music feedback issues?' becomes an immediate, urgent question, knowing a few quick, decisive actions can save the moment and prevent panic. Your ability to react calmly and effectively is a testament to your expertise.
Immediate Actions to Quell Feedback
- Lower the Master Volume (Slightly and Quickly): This is your first, instinctual move. A quick, small reduction in the master output can often break the feedback loop immediately. Don't drop it too much, or you'll lose the performance entirely.
- Identify the Problem Microphone/Source: Listen carefully. Is it the lead vocal mic? The acoustic guitar? The specific monitor? Isolate the source. If it's a specific microphone, quickly lower its channel fader.
- Adjust Microphone Position: If you can safely and discreetly do so, quickly reposition the offending microphone. Pull it further from a speaker, re-angle it, or move it away from a reflective surface. Even a few inches can make a difference.
- Quick EQ Sweep (If You Have Time and Skill): If you know your mixer well, you can try to quickly identify the ringing frequency and make a small, precise cut on that channel's EQ or a graphic EQ. This requires practice and a good ear, but it's incredibly effective.
- Change Monitor Mix: If the feedback is coming from a stage monitor, try lowering the level of the specific instrument or vocal in that monitor mix, rather than the entire monitor send.
- Communicate with Performers (Non-verbally): A subtle hand signal to a singer to move closer to the mic or away from a monitor can be a lifesaver.
When feedback hits, panic is your enemy. A calm, methodical response, drawing on a mental checklist of immediate actions, is what separates a good sound professional from a great one. You're not just fixing sound; you're preserving a priceless moment.

Frequently Asked Questions (FAQ)
Question: Can wireless microphones cause more feedback than wired ones? No, wireless microphones don't inherently cause more feedback than wired ones. The principles of acoustic feedback remain the same regardless of whether the mic is wired or wireless. However, wireless systems can introduce other issues like interference or signal dropouts if not set up correctly, which might be confused with feedback. Proper frequency coordination, strong signal strength, and correct gain staging are crucial for both types of mics.
Question: What's the difference between a graphic EQ and a parametric EQ for feedback suppression? A graphic EQ has a fixed number of frequency bands (e.g., 15 or 31 bands) that you can boost or cut. It's good for broad adjustments. A parametric EQ offers much more precise control: you can select the exact frequency you want to adjust, control the 'Q' or bandwidth (how wide or narrow the affected frequency range is), and then boost or cut. For surgically removing specific feedback frequencies, a parametric EQ is generally more effective and less likely to negatively impact the overall sound.
Question: Should I use a dedicated feedback suppressor pedal or device? Dedicated feedback suppressors can be useful, especially for less experienced operators or in challenging acoustic environments. They often work by automatically identifying and cutting feedback frequencies. However, they can sometimes 'suck the life' out of the sound by cutting desirable frequencies along with the problem ones. An experienced engineer can often achieve better results with manual EQ, but for quick, automatic suppression, they can be a valuable tool in an emergency kit.
Question: How do I tell if the feedback is from the monitors or the main speakers? Listen for the direction of the feedback. Is it coming from the stage (monitors) or out into the audience (main PA)? You can also try muting the monitor send for the offending channel to see if the feedback stops. If it does, the monitor mix is the culprit. If it persists, it's likely an issue with the main PA or a combination. Adjusting monitor levels first is often a good diagnostic step.
Question: Is there a universal frequency that always causes feedback? No, there isn't a single universal feedback frequency. Feedback frequencies are highly dependent on the specific microphone, speaker, room acoustics, and even the objects within the room. While some common problem areas exist (e.g., lower mids for bass resonance, upper mids for vocal clarity issues), each unique setup will have its own set of resonant frequencies that are prone to feedback. This is why a systematic approach to EQ and room ringing is essential.
Key Takeaways and Final Thoughts
- Proactive planning, especially a thorough pre-wedding sound check, is your most powerful weapon against feedback.
- Understanding the science behind feedback – the loop between mic, amplifier, and speaker – informs every solution.
- Microphone choice and precise placement, leveraging polar patterns, are foundational to a feedback-free sound.
- Strategic speaker positioning, keeping them in front of mics and elevated, ensures sound goes to the audience, not back into the system.
- Mastering gain staging and using EQ surgically are critical skills for any sound professional.
- Don't overlook the basics: high-quality, well-maintained cables and secure connections are essential.
- Always adapt your approach to the unique acoustics of each wedding venue.
- When feedback strikes, remain calm, identify the source, and use quick, decisive actions to resolve it.
Live wedding music is about creating an atmosphere, crafting memories, and delivering a flawless sonic experience. While the challenge of acoustic feedback is real, it's a battle that can be won with knowledge, preparation, and a calm, expert hand. By internalizing these strategies and continuously honing your craft, you won't just troubleshoot live wedding music feedback issues; you'll master them, ensuring every note resonates perfectly and every moment is cherished, not cringed at. Go forth and make beautiful music, free from the squeal!
Recommended Reading
- The Ultimate Guide: How to Plan Your Sustainable Eco-Friendly Beach Honeymoon
- 7 Proven Strategies: Ethically Sourcing Authentic Vintage Rings for Resale
- 7 Expert Strategies to Stop Delicate Dried Wedding Flowers Crumbling
- Bridal Shower Food Ideas for Picky Eaters: A Delicious Solution!
- Unlock Your Dream Day: What to Ask Garden Wedding Venue Coordinators Now!



Comments
Leave a comment below. Your email will not be published. Required fields marked with *