


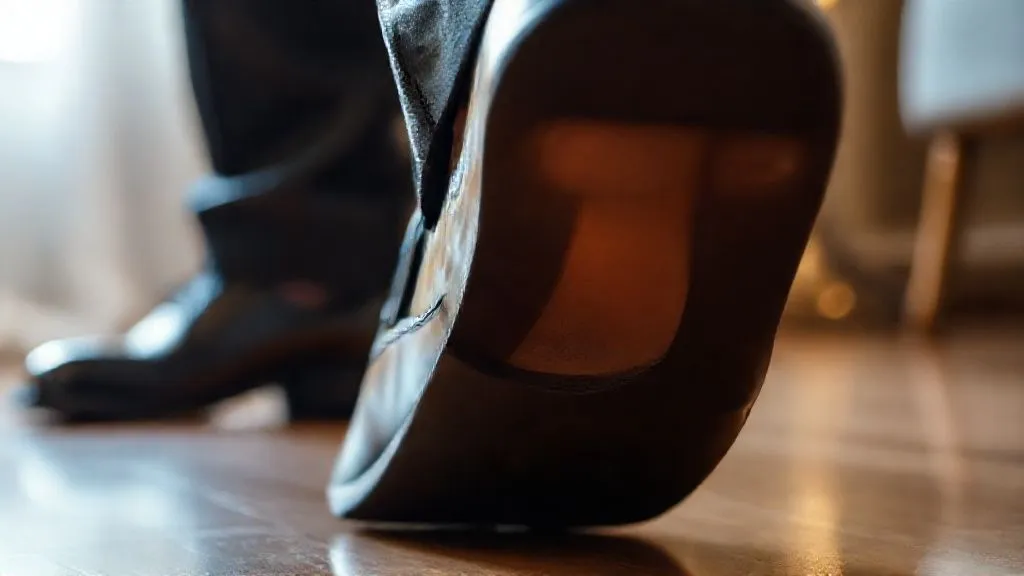
How to Prevent Painful Blisters in New Formal Wedding Shoes?
For over two decades in the wedding industry, specializing in groom attire, I've seen countless details meticulously planned – from bespoke suits to perfectly tied bow ties. Yet, one critical, often-overlooked element can derail a groom's comfort and confidence faster than anything else: the shoes. Specifically, the dreaded, painful blisters that new formal wedding shoes can inflict.
It's a common scenario: a groom invests in a stunning pair of new leather dress shoes for his wedding day, only to find himself hobbling by the reception, silently (or not so silently) cursing his footwear. The joy of the day, the dancing, the mingling – all overshadowed by the searing pain of friction blisters on his heels, toes, or the sides of his feet. This isn't just discomfort; it's a genuine problem that can impact your entire wedding experience.
But fear not, future grooms! Based on years of observation, expert advice, and practical solutions, I've compiled the definitive guide on how to prevent painful blisters in new formal wedding shoes. This isn't just a list of tips; it's a comprehensive strategy, incorporating actionable frameworks, insights from podiatrists, and time-tested methods to ensure your walk down the aisle and subsequent celebration are as comfortable as they are memorable.
Understanding the Enemy: Why New Formal Shoes Cause Blisters
Before we dive into prevention, it's crucial to understand why new formal shoes are such notorious blister-makers. It’s not just bad luck; it’s a combination of design, material, and human anatomy.
The Science of Friction and Pressure Points
Blisters are primarily caused by friction. When your foot repeatedly rubs against a surface – in this case, the stiff, unyielding interior of a new leather shoe – it creates shear forces between the skin's layers. This causes the outer layer of skin to separate from the inner layers, and the space fills with fluid, forming a blister. Formal shoes, particularly those made of rigid materials like patent leather or new calfskin, offer little give.
Adding to this, pressure points play a significant role. Ill-fitting shoes, even by a fraction, can create localized areas of high pressure. Common hotspots include the back of the heel, the top of the toes, the sides of the pinky toe, and the ball of the foot. These areas, when subjected to both pressure and friction, are prime targets for blister formation.
Common Culprits: Material, Fit, and Foot Anatomy
- Stiff Materials: New leather, especially high-quality formal leather, needs time to soften and mold to your foot. Until then, it's a rigid adversary.
- Improper Fit: Shoes that are too tight create constant pressure and rubbing. Shoes that are too loose allow your foot to slide around, generating excessive friction. Both are equally detrimental.
- Seams and Stitching: Internal seams, especially in cheaper shoes, can be rough and protrude, acting as direct irritants.
- Foot Anatomy: Every foot is unique. Bony prominences, bunions, hammer toes, or even a higher arch can mean certain areas are more prone to rubbing.
- Lack of Moisture Management: Sweaty feet increase friction. Moisture makes skin softer and more susceptible to damage.
The Proactive Approach: Pre-Wedding Shoe Preparation
The key to a blister-free wedding day lies in diligent preparation long before you say 'I do'. This isn't a last-minute scramble; it's a carefully executed strategy.
1. The "Break-In" Period: More Than Just Walking Around
This is perhaps the most crucial step. You simply cannot wear new formal shoes for the first time on your wedding day and expect comfort. They need to be broken in, gently and systematically.
- Start Early: Begin breaking in your shoes at least 4-6 weeks before the wedding. If they're particularly stiff, even earlier.
- Short Bursts, Frequent Intervals: Don't wear them for hours initially. Start with 30-minute sessions around the house, then gradually increase to an hour, then two.
- Wear Wedding Socks: Always wear the specific socks you intend to wear on your wedding day during the break-in period. This ensures the shoes mold correctly to your foot-and-sock combination.
- Mimic Wedding Day Activities: Practice walking, standing, and even a few dance moves. Pay attention to where the shoe rubs or feels tight.
- Moisturize Your Feet: Keeping your feet well-moisturized can make them more resilient to friction. Apply a good foot cream daily.
Remember, the goal is to soften the leather and allow the shoe to conform to the unique contours of your foot, reducing potential friction points. This gradual process is your best defense against painful blisters in new formal wedding shoes.

2. Strategic Stretching: Beyond the Basic Break-In
Sometimes, simply walking isn't enough, especially if a shoe is slightly snug in a particular area. Strategic stretching can make a significant difference.
- Shoe Stretchers: Invest in a good quality shoe stretcher, especially one that comes with 'bunion plugs' or 'spot stretchers'. These can target specific tight areas. Insert them into the shoes overnight, gradually increasing pressure.
- Professional Cobbler: For more stubborn shoes or specific pressure points, a professional cobbler can stretch your shoes using specialized equipment and techniques. This is often the safest and most effective method for high-value formal shoes.
- The Ice Bag Method (Use with Caution): Fill a sturdy Ziploc bag with water, place it inside the shoe where it’s tight, and then put the shoe in the freezer. As the water freezes, it expands, gently stretching the leather. Remove once frozen, let it thaw slightly, then remove the bag. Repeat if necessary. (Only for genuine leather, and ensure the bag is sealed perfectly to avoid water damage).
- Wear Thick Socks: While breaking in, wear thicker socks than your wedding day pair for a few sessions. This provides extra bulk to help stretch the shoe.
3. The Right Fit: A Non-Negotiable Foundation
The importance of a proper fit cannot be overstated. A perfectly fitted shoe is your first line of defense against blisters. As Dr. Emily Splichal, a prominent podiatrist, often emphasizes, "Your feet are the foundation of your body; invest in their support."
- Shop in the Afternoon: Your feet naturally swell throughout the day. Shopping in the afternoon ensures you're trying on shoes when your feet are at their largest, preventing you from buying shoes that will feel too tight later.
- Measure Both Feet: Most people have one foot slightly larger than the other. Always buy shoes to fit the larger foot.
- Stand Up: When trying on shoes, always stand up. Your feet spread and lengthen under weight.
- Walk Around: Don't just sit. Walk several laps in the store. Pay attention to any rubbing, pinching, or slipping.
- Check for a Thumb's Width: There should be about a thumb's width of space between your longest toe and the end of the shoe.
- Heel Grip: Your heel should feel snug but not tight. A slight lift is acceptable, but excessive slipping will cause friction.
Here’s a quick checklist for assessing shoe fit:
| Criteria | Ideal Fit | Blister Risk (Too Small) | Blister Risk (Too Big) |
|---|---|---|---|
| Toe Room | Thumb's width from longest toe to tip | Toe compression, nail issues | Toes clawing, excessive sliding |
| Heel Fit | Snug, minimal slip (less than 1/4 inch) | Heel friction, Achilles tendon rub | Excessive heel slip, back-of-heel blisters |
| Width | Comfortably cradles foot, no pinching | Side-of-foot pressure, bunion irritation | Foot slides side-to-side, arch strain |
| Arch Support | Gentle contact, feels supportive | Arch collapse, foot fatigue | Lack of support, arch pain |
Advanced Blister Prevention: Gear & Gadgets the Pros Use
Beyond breaking in and proper fit, there's an array of specialized products that can provide an extra layer of protection, ensuring your shoes remain comfortable throughout your special day.
Choosing the Perfect Socks: A Hidden Game-Changer
Your socks are the interface between your foot and your shoe. Their quality and material are paramount.
- Material Matters: Opt for socks made from natural, breathable fibers like merino wool or high-quality cotton blends. These wick away moisture, keeping your feet dry and reducing friction. Avoid 100% cotton, which absorbs moisture and stays wet, increasing blister risk.
- Seamless Design: Look for socks with minimal or flat seams, especially around the toes, to prevent irritation.
- Proper Thickness: Choose a thickness appropriate for your shoe fit. Too thick can make shoes tight; too thin can lead to excessive movement. A medium-thin, cushioned dress sock is often ideal.
- High-Quality Construction: Invest in good socks. They will hold their shape, provide consistent cushioning, and last longer. According to the American Podiatric Medical Association, proper sock choice is crucial for overall foot health and preventing common issues like blisters.
Protective Barriers: Tapes, Patches, and Balms
These are your secret weapons, applied directly to your foot or inside the shoe to create a barrier against friction.
- Moleskin or Blister Pads: Cut moleskin to size and apply it to known hot spots on your foot (heels, sides of toes) before putting on your shoes. These create a soft, protective layer. Blister pads are thicker and often have a gel center for cushioning.
- Athletic Tape or Kinesiology Tape: For areas prone to extreme friction, a thin layer of athletic or kinesiology tape applied directly to the skin can be highly effective. Ensure the tape is applied smoothly, without wrinkles, and doesn't restrict movement.
- Anti-Friction Balms/Sticks: Products like Body Glide or specialized foot balms create an invisible, slick barrier on your skin, drastically reducing friction. Apply generously to all potential rubbing areas before putting on socks and shoes.
- Heel Liners/Grips: These adhesive pads stick to the inside of your shoe's heel to prevent slippage and add cushioning. They are excellent for shoes that are slightly loose at the heel.

Insoles and Inserts: Customizing Your Comfort
Beyond basic socks, insoles can transform the comfort of your formal shoes, especially if you anticipate long hours on your feet.
- Gel Insoles: Provide excellent cushioning, particularly for the ball of the foot and heel. They absorb impact and reduce pressure.
- Orthotic Inserts: If you have specific foot concerns (e.g., flat feet, high arches), a custom or over-the-counter orthotic can provide targeted support, correct alignment, and distribute pressure more evenly, thus preventing blisters caused by improper foot mechanics.
- Heel Cushions: Small, discreet pads placed under the heel to absorb shock and slightly elevate the foot, which can sometimes alleviate pressure points at the back of the heel.
When selecting insoles, ensure they fit properly within your formal shoes without making them too tight. You might need to remove the shoe's existing insole if it's removable. For more on the benefits of insoles for formal footwear, consider insights from specialized foot health resources like Foot Health Facts.
On the Big Day: Last-Minute Strategies and Emergency Kits
Even with meticulous preparation, it's wise to have a plan for the wedding day itself. Think of it as your comfort contingency.
The "Emergency Blister Kit" Every Groom Needs
This small, discreet kit should be entrusted to your best man, a trusted groomsman, or even kept in a readily accessible spot. It’s a lifesaver if a hot spot develops.
- Blister Bandages: Specifically designed hydrocolloid bandages that cushion, protect, and promote healing for existing blisters.
- Small Scissors: For cutting moleskin or tape to size.
- Antiseptic Wipes: To clean any broken skin before applying a bandage.
- Moleskin/Blister Tape: For immediate application to hot spots before a blister forms.
- Anti-Friction Balm: For reapplication if needed.
- Pain Reliever: Just in case of general foot fatigue or discomfort.
- Spare Socks: A fresh pair of your wedding socks can be a godsend if your feet get sweaty.
Strategic Timing: When to Put On Your Shoes
Don't put your shoes on hours before you absolutely need to. Wait until closer to the ceremony or when you're getting dressed. This minimizes the time your feet are under pressure. If possible, consider wearing comfortable slip-on shoes or sneakers while getting ready and switch to your formal shoes just before the photos or ceremony.
Case Study: Mark's Miracle Wedding Day Comfort
Case Study: How Mark Achieved Blister-Free Bliss
Mark, a recent groom I worked with, was notoriously prone to blisters. For his wedding, he chose a stunning pair of Oxford shoes with a very firm leather. Following my advice, he started his break-in period three months out, wearing the shoes for short intervals with his wedding socks while working at his standing desk. He also visited a cobbler to have the vamp slightly stretched. On the wedding day, he applied anti-friction balm to his heels and toes and wore seamless merino wool blend socks. He kept a small emergency kit with his best man, complete with hydrocolloid patches. The result? Mark danced until 2 AM, completely blister-free. He later told me, "I genuinely forgot I was wearing new shoes. It made such a difference to how much I enjoyed every moment." This demonstrates the power of a comprehensive, proactive approach to how to prevent painful blisters in new formal wedding shoes.
Post-Wedding Care and Lessons Learned
Your wedding day might be over, but the lessons learned about foot comfort can extend far beyond. And your shoes deserve proper care too!
Addressing Post-Event Foot Fatigue
Even without blisters, your feet will likely be tired after a full day in formal shoes. Soak them in a cool foot bath with Epsom salts. Elevate your feet to reduce swelling. A gentle foot massage can also work wonders. Remember, investing in your comfort on such a significant day is an investment in your overall well-being and enjoyment.
Long-Term Shoe Care for Lasting Comfort
Your formal wedding shoes are an investment. Proper care ensures they remain comfortable for future events:
- Use Shoe Trees: Always insert cedar shoe trees after each wear. They absorb moisture and help maintain the shoe's shape, preventing creases that can become friction points.
- Clean and Condition: Regularly clean and condition the leather to keep it supple. Dry, stiff leather is more prone to rubbing.
- Store Properly: Keep shoes in breathable bags or boxes to protect them from dust and damage.
"The true elegance of a groom is not just in his attire, but in his effortless confidence, unmarred by discomfort. Don't let your shoes dictate your enjoyment of your most important day." - A Veteran in Groom Attire
Frequently Asked Questions (FAQ)
Q: Can I just wear my old, comfortable shoes instead of buying new ones? A: While the comfort is tempting, new formal shoes are often part of the overall aesthetic and formality of a wedding. However, if your old shoes are impeccably maintained, match the attire perfectly, and are truly comfortable, it's a personal choice. The goal is comfort *and* style. If you opt for old shoes, ensure they look pristine.
Q: How long does it really take to break in new formal shoes, on average? A: It varies greatly depending on the shoe material, construction, and your individual foot. Generally, plan for at least 20-30 hours of wear, spread out over 4-6 weeks. Stiffer leathers like patent or cordovan might need longer, while softer calfskin might be quicker. Consistency is key.
Q: Are gel inserts enough to prevent blisters, or do I need other precautions? A: Gel inserts are excellent for cushioning and shock absorption, which can reduce pressure and some forms of friction. However, they are rarely a standalone solution. For comprehensive blister prevention, combine them with proper shoe fit, a diligent break-in period, and strategic use of anti-friction balms or tapes on hot spots.
Q: What if I already have a blister on the morning of my wedding? A: Don't panic! Clean the area gently with an antiseptic wipe. Do NOT pop the blister unless it's very large and painful (and then only with a sterilized needle and careful aftercare, ideally by a medical professional). Apply a hydrocolloid blister bandage. These bandages create a moist healing environment, reduce pain, and provide cushioning. Follow up with your emergency kit items for added protection.
Q: What's the best material for formal wedding shoes to avoid blisters? A: While traditional smooth calfskin leather is popular, a high-quality, supple calfskin will break in more comfortably than stiff patent leather. Suede can also be very comfortable but is less formal for some wedding styles. Regardless of material, the key is the quality of the leather and the shoe's construction, which dictates how well it will mold to your foot.
Key Takeaways and Final Thoughts
Your wedding day should be about celebration, joy, and making unforgettable memories, not about enduring foot pain. By adopting a proactive and informed approach, you can easily conquer the challenge of how to prevent painful blisters in new formal wedding shoes.
- Start Early: Begin breaking in your shoes at least 4-6 weeks in advance.
- Prioritize Fit: Ensure your shoes are perfectly sized, ideally by shopping in the afternoon.
- Strategic Protection: Utilize high-quality socks, anti-friction balms, and protective tapes or pads.
- Prepare an Emergency Kit: Have a small kit ready for any last-minute hot spots.
- Invest in Quality: Both your shoes and your comfort products should be of good quality.
Remember, the effort you put into preparing your footwear is an investment in your comfort and confidence on one of the most important days of your life. Walk tall, dance freely, and enjoy every single moment, knowing your feet are as ready for the celebration as you are. For more insights on perfecting your groom's look, explore resources like GQ's Men's Style section.
Recommended Reading
- Beat the Buffet Rush: 7 Ways to Shorten Wedding Food Station Lines
- Wedding Timeline Recovery: 7 Steps to Navigate Unforeseen Delays
- Unlock Your Dream Day: What to Ask City View Wedding Venue Managers
- 7 Pro Strategies: Stop Wedding Cupcake Frosting Meltdowns in Outdoor Heat
- Mastering Your Engagement Party Budget: The Ultimate Guide to Food & Drinks




Comments
Leave a comment below. Your email will not be published. Required fields marked with *