


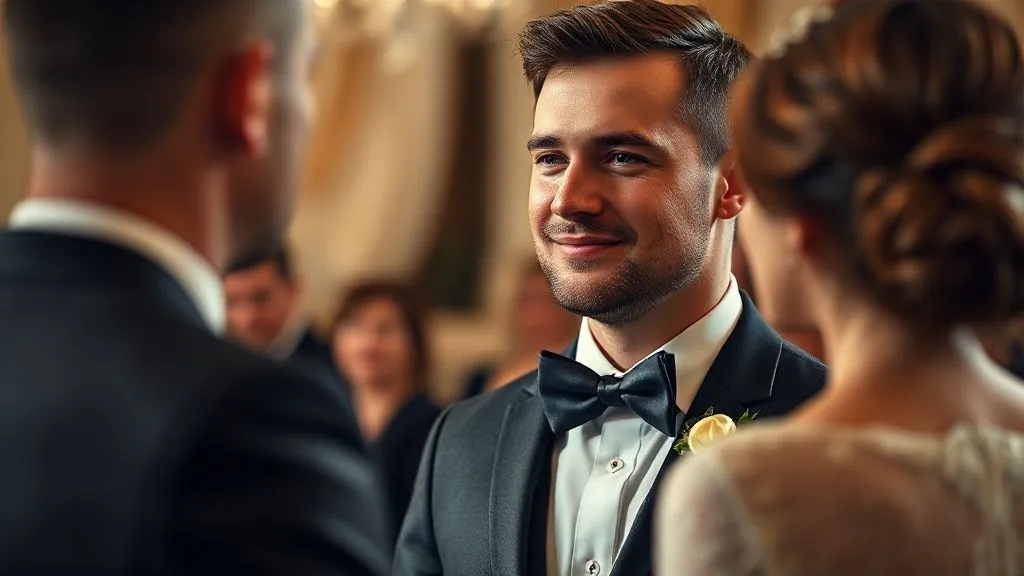
Preventing a self-tied bow tie from unraveling during vows?
For over 15 years in the wedding industry, I've witnessed countless magical moments. I've also seen the subtle, yet palpable, anxiety that can creep into a groom's posture when his perfectly chosen self-tied bow tie begins to betray him. It’s a small detail, but one that can loom large, distracting from the profound significance of the vows being exchanged.
Imagine standing at the altar, pouring your heart out, only to feel that familiar loosening around your neck. The subtle tug, the mental note to adjust, the fear of looking disheveled in front of everyone, and worse, in those timeless photographs. It's a pain point many grooms don’t anticipate, but one that I assure you is entirely preventable.
This isn't just about tying a knot; it's about securing a symbol of your elegance and confidence for one of the most important days of your life. In this definitive guide, I'll share expert insights, actionable techniques, and the insider secrets I've gathered over years of helping grooms look and feel their best, ensuring your bow tie stays perfectly poised from the first glance to the last dance.
The Foundation: Choosing the Right Bow Tie Fabric and Construction
Before you even think about tying, the battle for a secure bow tie is often won or lost in the initial selection. I've seen grooms agonize over patterns and colors, only to overlook the fundamental elements that dictate a bow tie's performance.
Fabric Matters: Silk vs. Cotton vs. Wool
The material of your bow tie plays a critical role in how well it holds a knot. Silk, particularly a heavier, textured silk like shantung or grenadine, is often my top recommendation. Its natural grip, due to its subtle texture, helps the knot lock into place. Smooth, highly polished silks, while luxurious, can be more prone to slipping if not tied meticulously.
Cotton bow ties, especially those with a slight weave, offer good friction and are often more forgiving for beginners. Wool, while less common for formal wedding attire, provides excellent grip but might be too bulky depending on the desired knot size. Avoid overly synthetic, slick fabrics; they are the most notorious culprits for unraveling.

Interlining and Quality Construction
Beyond the outer fabric, the internal construction – specifically the interlining – is paramount. A quality self-tied bow tie will have a robust, yet flexible, interlining that gives it body and helps maintain its shape. A flimsy interlining means a flimsy knot, prone to collapsing or loosening under minimal stress. Always feel the bow tie; it should have a substantial, resilient feel without being overly stiff.
In my experience, investing in a high-quality bow tie with proper interlining is not an extravagance, but a strategic decision that pays dividends in confidence and appearance on your wedding day. It’s the hidden support system for your knot.
As GQ often emphasizes, true style is in the details and the quality of construction. A well-made bow tie is designed to hold its form.
Mastering the Knot: Step-by-Step for Unyielding Security
This is where the rubber meets the road. Tying a secure knot isn't about brute force; it's about precision, understanding the fabric, and consistent practice. The classic butterfly knot is the most common and, when done correctly, incredibly stable.
The Classic Butterfly Knot: A Detailed Breakdown
I've guided countless grooms through this, and the key is not to rush. Each step builds on the last, creating a structure that resists loosening.
- Start with the Right Length: Drape the bow tie around your neck with one end longer than the other (usually the right side). The longer end should be about 3-4 inches below your desired finished length.
- The Initial Cross: Cross the longer end over the shorter end.
- The First Loop: Bring the longer end up through the neck loop from underneath. This creates the initial knot that will anchor everything. Pull it snug, but not overly tight.
- Form the First Wing: Take the shorter end and fold it horizontally across your collar, forming one half of the bow shape. This will be the back wing.
- Drape the Longer End: Bring the longer end straight down over the front of the first wing you just formed.
- The Second Wing & Loop: Fold the longer end horizontally, mirroring the first wing. Then, carefully push this folded end through the loop you created behind the first wing. This is the trickiest part, requiring finesse.
- Adjust and Tighten: Gently pull on the folded ends of the bow (the 'wings') and the loops at the back of the knot simultaneously. This is where the magic happens, cinching the knot into place.

The Crucial "Tightening and Setting" Phase
Once you've formed the basic knot, the final adjustments are what truly determine its staying power. This isn't just about making it look good; it's about making it feel secure.
The Art of the Final Pull
After step 7, don't just stop. You need to "set" the knot. Gently, but firmly, pull on the outer edges of the bow's wings, then on the two ends of the neckband simultaneously. Alternate these pulls, gradually tightening the knot until it feels firm and resilient. It should be snug against your collar without choking you. Think of it as interlocking the fabric fibers.
Symmetry and Snugness: Finding the Balance
A common mistake I observe is focusing solely on symmetry before security. While symmetry is important for aesthetics, a slightly asymmetrical but rock-solid knot is far preferable to a perfectly balanced but loose one. Once the knot is snug, then you can make small, iterative adjustments to the wings to achieve your desired shape and balance. Remember, a self-tied bow tie is meant to have character; slight imperfections are part of its charm.
Never over-tighten to the point of discomfort or fabric strain. A well-tied knot relies on the friction of the fabric against itself, not on cutting off circulation. Find that sweet spot where it feels anchored, but still allows you to breathe and speak naturally.
Pre-Wedding Day Practice: Rehearsal for Perfection
You wouldn't give a speech without practicing, so why would you expect a perfect bow tie on your first attempt on the big day? Practice is non-negotiable for preventing a self-tied bow tie from unraveling during vows?
The Dress Rehearsal Tie
About a week or two before the wedding, I advise grooms to perform a "dress rehearsal tie." Put on the actual shirt and bow tie you'll wear. Tie the bow tie as if it were the wedding day. Wear it for a few hours, moving around, sitting, standing, and even saying a few words aloud. This helps you get a feel for how the tie sits, how the fabric behaves, and if any adjustments are needed.
The "Stress Test" Method
During your practice sessions, gently stress-test the knot. Don't yank it, but try to simulate natural movements: turning your head, reaching for a drink, hugging someone. Observe if the knot shifts or loosens. If it does, identify where the weakness is and adjust your tying technique. This proactive approach is invaluable.
Case Study: How John's Pre-Wedding Practice Saved His Vows
John, a groom I worked with last year, was initially confident in his bow-tying skills. He’d worn them to other formal events. However, during his practice session, he discovered that his chosen silk bow tie, while beautiful, had a slightly smoother finish than his usual ones. After about an hour of wear, it would begin to loosen subtly. By identifying this early, we practiced a slightly different tightening technique, focusing on interlocking the silk more firmly. On his wedding day, his bow tie remained impeccable, allowing him to focus entirely on his bride and their vows, free from any sartorial anxiety. This resulted in him feeling completely at ease and present.
Strategic Accessories: The Unsung Heroes of Bow Tie Stability
While a well-tied knot is paramount, certain accessories can provide an extra layer of security, acting as your secret weapon against an unruly bow tie.
Bow Tie Stays and Pins
These are small, often metallic or plastic, devices designed to clip onto the back of your bow tie and either anchor it to your shirt collar or provide additional structure. A discreet bow tie stay can prevent the wings from drooping or shifting outwards, maintaining that crisp, formal look. For particularly active grooms, or those with very soft collars, a small, nearly invisible pin through the back of the knot and into the shirt can offer unparalleled stability. Ensure any pin is small, sharp, and won't damage the fabric.
The Role of the Collar
The type and stiffness of your shirt collar significantly impact how well your bow tie sits and holds. A firm, well-structured collar (like a wing collar or a classic point collar with good stiffness) provides a solid foundation for the bow tie to rest against. A flimsy or overly soft collar offers less support, making the bow tie more prone to shifting and potentially loosening. Always choose a shirt with a collar designed to complement a bow tie.
| Accessory | Benefit | Best For |
|---|---|---|
| Bow Tie Stays | Prevents drooping, maintains wing shape | Soft collars, active movement |
| Discreet Pins | Anchors knot directly to shirt, maximum security | All bow ties, high-stress situations |
| Collar Stays (Shirt) | Keeps shirt collar crisp, provides firm base | Any shirt collar worn with a bow tie |
According to experts at The Knot, ensuring all elements of groom's attire, from the shirt to the bow tie, work in harmony is key to a polished look.
Weather, Sweat, and Movement: Anticipating the Challenges
The wedding day isn't a static photoshoot; it's a dynamic event. Anticipating environmental factors and your own movements is crucial for preventing a self-tied bow tie from unraveling during vows?
Humidity and Fabric Behavior
High humidity can cause some fabrics, particularly silk, to relax slightly. This subtle expansion can contribute to a knot loosening. If you're marrying in a humid climate, consider fabrics known for their stability, like a crisp cotton, or ensure your silk bow tie is exceptionally well-tied with extra attention to the final tightening. A well-ventilated venue can also make a difference.
Managing Sweat and Heat
Nerves, dancing, and warm weather can lead to perspiration, which can also affect fabric friction. Wearing an undershirt made of moisture-wicking material can help keep your neck and collar dry, thereby preserving the integrity of your bow tie knot. Staying hydrated and cool throughout the day will also minimize excessive sweating.
Mindful Movement During the Ceremony
While you shouldn't be stiff, being mindful of sudden, jerky movements can help. When turning your head, do so smoothly. When hugging, be gentle around the neck area. These small considerations can prevent accidental nudges that might loosen a knot that is otherwise perfectly secure.
On your wedding day, your focus should be on your partner, not your attire. By anticipating these challenges and preparing for them, you empower yourself to be fully present and enjoy every moment without distraction.
Emergency Kit Essentials: A Groom's Best Friend
Even with the best preparation, unforeseen circumstances can arise. An emergency kit, or what I like to call a "Groom's Go-Bag," is a non-negotiable safeguard.
What to Include
- A spare bow tie: If all else fails, a fresh start is sometimes the best solution.
- Small safety pins: For discreetly securing a loose wing or the back of the knot.
- Mini sewing kit: For minor snags or loose threads that might affect the bow tie's integrity.
- Lint roller: To keep everything looking pristine.
- Stain remover wipes: For any unexpected spills.
Assigning a "Bow Tie Butler"
Designate a trusted groomsman, the best man, or even your wedding planner as your "bow tie butler" for the day. This person should be briefed on how to quickly and discreetly assist you with any minor adjustments or, in a worst-case scenario, re-tie your bow tie. This frees you from worrying about it yourself, allowing you to relax and enjoy the celebration. Ensure they have access to your emergency kit.
Common Mistakes to Avoid for a Flawless Look
Knowing what to do is important, but knowing what *not* to do is equally vital for preventing a self-tied bow tie from unraveling during vows?
Rushing the Tie
The wedding morning is often a whirlwind of activity. Resist the urge to tie your bow tie in a hurry. Allocate specific, calm time for this task. Rushing leads to sloppy knots that are inherently unstable.
Ignoring Fabric Quality
As I mentioned earlier, cheap, slick fabrics are your enemy. Don't compromise on the quality of your bow tie to save a few dollars. It's a key element of your formal attire and deserves proper consideration.
Forgetting the Post-Tie Check
Once tied, always perform a quick visual and tactile check. Does it feel firm? Are the wings relatively even? Does it sit squarely against your collar? A minute spent on this check can save you hours of anxiety.
Over-Adjusting Throughout the Day
Once it's tied and set, try to resist the urge to constantly touch or adjust it. Fiddling with a knot can loosen it more than it helps. Trust your initial tie and your preparation.
Frequently Asked Questions (FAQ)
Question? Can I use fabric stiffener or hairspray to make my bow tie hold its shape better?
Answer: I strongly advise against using fabric stiffeners or hairspray directly on your bow tie. While they might temporarily stiffen the fabric, they can damage delicate materials like silk, leave residue, and potentially alter the color or texture. More importantly, a well-tied knot on a quality fabric shouldn't need such artificial aids. Focus on mastering the tying technique and choosing the right fabric. If you're concerned about wing shape, discreet bow tie stays are a far safer and more effective solution.
Question? How tight is too tight for a self-tied bow tie? I worry about it being uncomfortable.
Answer: The ideal snugness allows the bow tie to sit firmly against your collar without causing any discomfort or restricting your breathing. You should be able to comfortably slip a finger between the neckband and your skin, but it shouldn't feel loose enough to shift or rotate freely. If you feel any strain or pressure, it's too tight. Practice finding this balance – it's crucial for both comfort and security. A good knot relies on friction, not constriction.
Question? What if my hands are shaky on the wedding day due to nerves? How can I ensure a perfect tie?
Answer: This is a very common concern! My top advice here is twofold: firstly, practice, practice, practice. Muscle memory is your best friend. The more you've tied it, the more automatic the process becomes. Secondly, and perhaps more crucially, don't tie it yourself on the morning of if you're feeling particularly nervous. Enlist a trusted friend, family member, or groomsman who has also practiced tying it and has a steady hand. Brief them thoroughly beforehand, or even have them practice on you. This small delegation can significantly reduce your stress.
Question? Does the type of shirt collar really make a difference for bow tie security?
Answer: Absolutely, it makes a significant difference. A well-constructed, relatively stiff collar provides a stable foundation for your bow tie. Collars with less structure, or those that are too wide or too narrow for the bow tie's neckband, can allow the bow tie to shift, droop, or lose its shape more easily. For traditional formal wear, a wing collar or a classic point collar with good interlining is ideal. The collar acts as a brace, helping to keep the bow tie in place.
Question? Is it ever acceptable to just use a pre-tied bow tie for ultimate security, even if I prefer the self-tied look?
Answer: While a self-tied bow tie undeniably offers a superior aesthetic – that unique, slightly imperfect charm that signals genuine elegance – a high-quality pre-tied bow tie is a perfectly acceptable alternative if your primary concern is absolute security and peace of mind. Modern pre-tied options have come a long way in mimicking the look of a self-tied knot. If you've practiced extensively and still feel immense anxiety about preventing a self-tied bow tie from unraveling during vows?, then a pre-tied option is a pragmatic choice. However, I always encourage grooms to try mastering the self-tie first, as the confidence it instills is truly unmatched.
Key Takeaways and Final Thoughts
The journey to a perfectly secured bow tie on your wedding day is one of preparation, precision, and confidence. It's about more than just a piece of fabric; it's about eliminating a potential source of stress so you can fully embrace the joy of the moment.
- Quality First: Choose a bow tie made from a textured fabric with good interlining.
- Master the Knot: Practice the classic butterfly knot until it becomes second nature, focusing on the crucial tightening phase.
- Rehearse and Stress Test: Simulate wedding day conditions to identify and resolve issues beforehand.
- Strategic Support: Utilize bow tie stays, pins, and a well-structured shirt collar for added stability.
- Plan for the Unexpected: Prepare an emergency kit and delegate a "bow tie butler" for peace of mind.
Remember, your wedding day is a celebration of love, not a fashion show of anxiety. By following these expert strategies, you're not just tying a bow tie; you're securing your confidence, ensuring that your focus remains exactly where it should be – on your partner, your vows, and the beautiful beginning of your shared life. Go forth, secure in your style, and enjoy every single moment.
Recommended Reading
- Sheet Wedding Cake Transport: The Ultimate Safe Delivery Guide
- 7 Proven Ways: How to Make Wedding Favors Genuinely Memorable for Guests
- The Ultimate Guide: How to Estimate Wedding Alcohol Consumption Accurately
- Craft Perfect Reception Card Wording: 7 Tips for Tricky Guest Lists
- 5 Expert Ways Wedding Planners Resolve Guest Dress Code Disputes
Comments
Leave a comment below. Your email will not be published. Required fields marked with *