


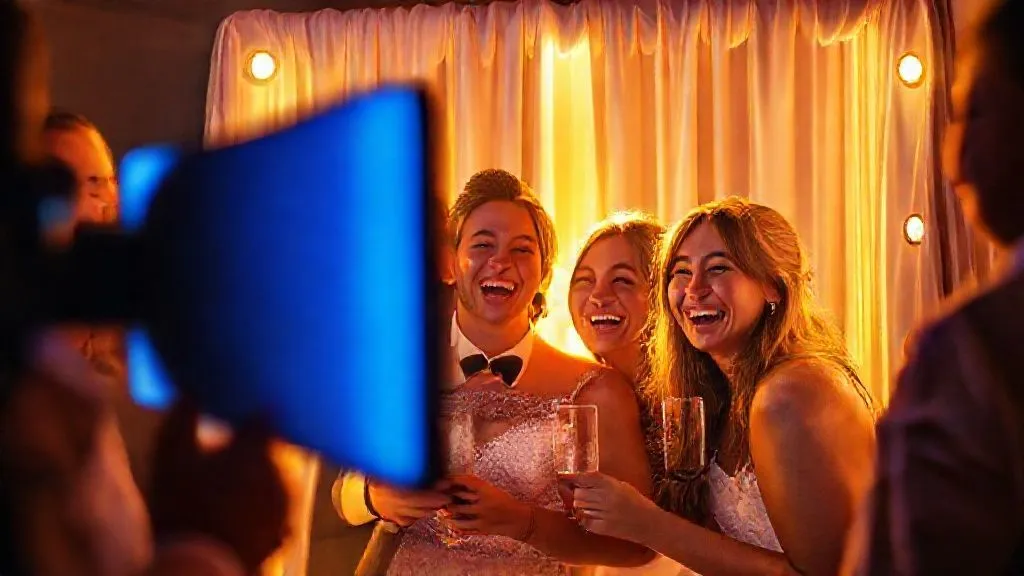
How to fix poor lighting in a wedding photo booth instantly?
For over 15 years, I've had the incredible privilege of capturing countless wedding memories, from the grand ceremonies to the intimate dance floor moments. But I've also witnessed a common, frustrating scenario: the dreaded photo booth with subpar lighting. It's a real shame when guests, full of joy and excitement, step into a booth only to emerge with dark, grainy, or harshly lit photos that don't reflect the vibrant energy of the celebration.
This isn't just about a bad photo; it's about a missed opportunity to create lasting, high-quality keepsakes for your clients and their guests. Poor lighting can turn fun into frustration, leaving everyone with images they'd rather not share. The disappointment is palpable, and as a professional, it's something I've always strived to prevent.
But here's the good news: you don't have to settle for mediocrity. In this definitive guide, I'm going to share my battle-tested strategies, techniques, and insider secrets that will empower you to instantly fix poor lighting in a wedding photo booth. We'll dive deep into actionable frameworks, real-world solutions, and expert insights to ensure every photo booth picture is a masterpiece of light and laughter.
Understanding the Enemy: Common Photo Booth Lighting Fails
Before we can fix a problem, we must first understand its root causes. In the world of wedding photo booths, lighting issues often manifest in predictable, yet frustrating, ways. I've seen them all, from dimly lit corners to blinding flashes that wash out expressions.
Too Dark & Grainy: The Underexposure Trap
This is perhaps the most common culprit. When there isn't enough light hitting your subjects, your camera has to work harder, pushing its ISO sensitivity. The result? Dark images riddled with digital noise, lacking detail and vibrancy. Guests look like shadows, and the fun, colorful props become indistinguishable.
Harsh Flash & Hot Spots: The Blinding Effect
On the flip side, an undiffused, on-camera flash can be equally detrimental. It creates harsh shadows, blows out skin tones, and produces unflattering glare, often known as 'hot spots,' especially on foreheads or shiny objects. The deer-in-headlights look is a clear sign of this issue, and it instantly cheapens the photo's quality.
Flat, Lifeless Photos: The Absence of Dimension
Sometimes, there's enough light, but it's coming from a single, direct source without any thought to shaping. This results in flat, two-dimensional images that lack depth, contrast, and visual interest. Faces appear bland, and the festive atmosphere isn't translated into the photograph.
Mixed Lighting Nightmares: Color Cast Chaos
Wedding venues often have a mix of ambient light sources – tungsten bulbs, fluorescent lights, natural window light, and even decorative LEDs. When these different color temperatures combine, your camera struggles to find a consistent white balance, leading to strange color casts that can make skin tones look sickly or unnatural. This is a common pitfall that requires a proactive approach.
Expert Insight: "Lighting isn't just about brightness; it's about shaping, mood, and color. A truly great photo booth experience hinges on understanding how light interacts with your subjects and environment, and then taking control of it. Don't let the venue dictate your results."
The Instant Fix Arsenal: Portable Continuous Lighting
One of the quickest and most effective ways to instantly fix poor lighting in a wedding photo booth is to introduce reliable, portable continuous lighting. This is my go-to solution for consistency and ease of use, especially when dealing with unpredictable ambient light.
LED Panels and Ring Lights: Your Best Friends
Modern LED panels offer incredible versatility. They are lightweight, energy-efficient, and many models allow you to adjust both brightness and color temperature (bi-color). Ring lights are fantastic for creating soft, even, frontal illumination that minimizes shadows and creates a pleasing catchlight in the eyes.
- Soft, Even Illumination: Continuous lights provide a constant, predictable light source, making it easier to control exposure and shadows.
- Instant Feedback: What you see is what you get. You can visually adjust the light until it looks perfect before anyone even steps into the booth.
- Adjustable Color Temperature: Many LEDs allow you to dial in the warmth or coolness of the light, helping to combat mixed ambient lighting.
- User-Friendly: No complex flash sync settings; just turn them on and adjust intensity.
When selecting LED panels, look for models with a high Color Rendering Index (CRI) of 95 or above to ensure accurate color reproduction. Placement is key: position them slightly to the sides and above the camera to wrap light around your subjects, or use a large ring light for direct, flattering illumination.

Pro Tip: "Always aim for a broad, soft light source. The larger the light source relative to your subject, the softer and more flattering the light will be. This principle is fundamental to professional photography and applies perfectly to photo booths."
Mastering the Flash: Off-Camera and Diffused Strobes
While continuous lighting is excellent, sometimes you need the power and speed of flash, especially in very dark environments or for freezing motion. The trick is to use it intelligently, moving it off-camera and diffusing its output.
The Power of Diffusion: Softboxes and Umbrellas
Never point a bare flash directly at your subjects in a photo booth. The key to beautiful flash photography is diffusion. A small softbox, a shoot-through umbrella, or even a simple bounce card can transform harsh light into a soft, flattering glow. These modifiers effectively enlarge the light source, mimicking natural window light.
Off-Camera Placement: The 45-Degree Rule
Mounting your flash on a light stand, slightly off to the side (around 45 degrees from the camera) and angled down towards the subjects, creates much more dimension and avoids the flat, head-on look. If possible, use two flashes, one on each side, for even more balanced illumination.
- Position the Light Stand: Place it about 4-6 feet from the subjects, at a 45-degree angle to the camera.
- Attach Modifier: Secure a softbox or umbrella to the flash.
- Angle the Flash: Point the flash/modifier slightly downwards towards where the subjects will stand.
- Test Fire: Take a few test shots, adjusting flash power until exposure is perfect.
- Consider a Second Flash: For optimal results, add a second diffused flash on the opposite side to fill in shadows.
Using a wireless trigger system for your off-camera flashes is essential for seamless operation. This setup allows you to precisely control the quality and direction of your light, making a dramatic difference in photo booth output.
Harnessing Ambient Light (When You Can!)
Sometimes, the best light is already there, you just need to know how to use it. While not always an 'instant fix' in every scenario, understanding ambient light can guide your initial photo booth placement decisions and minimize the need for heavy artificial lighting.
Utilizing Natural Window Light
If your photo booth is set up near a large window during daylight hours, you have a fantastic, soft light source at your disposal. Position the booth so the window acts as the primary light source, illuminating your subjects from the front or slightly to the side. This provides a beautiful, natural look that's hard to beat.
Bouncing Ambient Light: Reflectors to the Rescue
Even if the natural light isn't directly hitting your subjects, you can often bounce it. A simple reflector (gold for warmth, silver for brightness, white for neutrality) can be positioned opposite the light source to fill in shadows and provide a softer, more even illumination. This is a low-tech, highly effective way to instantly fix poor lighting in a wedding photo booth without adding more power-hungry equipment.

The Magic of Modifiers: Shaping Your Light
Modifiers are the unsung heroes of good lighting. They are the tools that transform raw light into something beautiful and flattering. Investing in the right modifiers can instantly elevate your photo booth's output.
Understanding Different Modifiers
- Softboxes: Enclose the light source, creating a large, soft, directional light. Ideal for controlled, flattering light.
- Umbrellas (Shoot-Through/Reflective): Provide a broad, soft light. Shoot-throughs diffuse light as it passes, reflectives bounce light off their inner surface.
- Beauty Dishes: Offer a slightly harder, more contrasty light than softboxes, often used for fashion photography but can be great for a punchy, glamorous look.
- Grids: Attach to softboxes or beauty dishes to narrow the beam of light, preventing spill and adding drama.
| Modifier Type | Light Quality | Best Use |
|---|---|---|
| Softbox | Soft, Directional | Flattering portraits, controlled light |
| Umbrella | Broad, Soft, Less Control | General fill, quick setup |
| Beauty Dish | Punchy, Moderate Contrast | Glamorous look, defined shadows |
| Grid | Narrow Beam, Dramatic | Highlighting specific areas, reducing spill |
Case Study: How 'Everlasting Memories' Transformed Their Photo Booth Experience
Everlasting Memories, a boutique wedding photography service, struggled with inconsistent photo booth quality. Their standard setup involved a single, bare on-camera flash. Guests often complained about harsh shadows and red-eye. After attending one of my workshops, the owner, Sarah, decided to implement two key changes: she invested in two small, portable LED panels with softboxes and positioned them on light stands, slightly off-axis from the camera. She also trained her assistants to use custom white balance settings for each venue.
The results were immediate and dramatic. Photo booth images went from being an afterthought to a highlight. Guests loved the flattering, professional-looking photos, and Everlasting Memories saw a significant increase in positive reviews mentioning their 'amazing photo booth.' This simple shift in lighting strategy, focusing on diffused, off-camera continuous light, not only solved their lighting problem but also enhanced their brand reputation and client satisfaction.
White Balance and Exposure: The Digital Advantage
Even with perfect physical light setup, your camera's settings play a crucial role. Understanding white balance and exposure can instantly fix poor lighting in a wedding photo booth by ensuring accurate colors and brightness.
Custom White Balance for Consistency
As mentioned earlier, mixed lighting can be a nightmare. Instead of relying on auto white balance (AWB), which can shift between shots, take control. Use a gray card or a white balance tool to set a custom white balance (CWB) specific to the photo booth's lighting environment. This ensures consistent, accurate colors across all photos, regardless of the ambient light shifts. It's a fundamental step that many overlook, but it makes a world of difference. For more on the importance of white balance, check out this guide from PetaPixel on Understanding White Balance.
Monitoring Your Histogram: Your Exposure Guide
Your camera's histogram is a powerful tool for checking exposure. Before the event begins, take test shots and review the histogram. A well-exposed image will have a histogram with data spread across the middle, without being clipped on either the far left (underexposed) or far right (overexposed). Adjust your light intensity, ISO, or aperture until your histogram looks balanced. This proactive approach prevents you from discovering a batch of poorly exposed photos later.
Expert Insight: "While post-processing can fix some issues, it's always more efficient and produces higher quality results to get it right in-camera. Think of your photo booth setup as a mini studio; every setting matters."
Powering Your Setup: Reliability is Key
Having the best lighting gear means nothing if it runs out of juice. Power management is a critical, often overlooked, aspect of ensuring your photo booth runs flawlessly from start to finish. A dead battery or tripped circuit can instantly bring the fun to a halt.
Battery Solutions and Power Banks
For continuous lights, invest in high-capacity V-mount or NP-F style batteries. For flashes, ensure you have plenty of fresh AA or custom lithium-ion batteries. Always carry spares, and consider a portable power station (like a Jackery or Goal Zero) if your setup is extensive or if you're working in a remote location without easy access to wall outlets. Reliability here is non-negotiable. For a deeper dive into portable power solutions for photographers, a resource like B&H Photo's guide on Portable Power Solutions can be invaluable.
Cable Management and Safety
Loose cables are not only an eyesore but a significant trip hazard in a busy wedding environment. Use cable ties, gaffer tape, and cable ramps to secure all power cords. Ensure your power strips and extension cords are rated for the equipment you're using to prevent overloading circuits. Safety should always be your top priority, protecting both guests and your valuable gear.
Strategic Placement: Where Your Light Lives
The physical placement of your light sources is just as important as the quality of the light itself. Even the best gear can produce poor results if positioned incorrectly. This is where your understanding of light direction comes into play.
Frontal vs. Side Lighting
For a photo booth, you generally want a broad, frontal light source to illuminate faces evenly. However, a purely frontal light can be flat. My preferred method is to use two light sources, positioned at a 45-degree angle to the left and right of the camera, slightly above eye level. This creates a gentle wrap-around light that adds dimension without harsh shadows. Avoid placing lights directly above, which can create unflattering shadows under the eyes and nose.
Avoiding Backlight Traps
Never place your primary light source behind your subjects unless you are intentionally going for a silhouette effect, which is generally not ideal for a wedding photo booth. Backlighting will leave your subjects underexposed and silhouetted against a bright background, making it impossible to see their expressions or the fun props. If there's a strong light source behind the booth (like a bright window or decorative uplights), you'll need powerful frontal lighting to overcome it and prevent underexposure. For visual examples of lighting placement, resources like Adorama's Studio Lighting Diagrams can offer great insights.

Pre-Wedding Scouting & Testing: No Surprises!
The best way to instantly fix poor lighting in a wedding photo booth is to prevent it from happening in the first place. This requires diligent planning and testing well before the wedding day. Surprises are fun for guests, not for your lighting setup.
Site Visits and Test Shots
If possible, scout the photo booth location at the venue during a similar time of day as the event. This allows you to assess ambient light, power outlets, and space constraints. Take test shots with your actual equipment. This is your chance to identify potential issues and fine-tune your settings without the pressure of a live event.
Contingency Planning
Always have a backup plan. What if a light fails? What if a power outlet doesn't work? Carry extra batteries, spare bulbs, and even a smaller, simpler backup light source. A reliable professional is always prepared for the unexpected. I've seen countless photographers caught off guard, and it often comes down to a lack of preparation. A robust contingency plan is your ultimate instant fix for unforeseen lighting challenges.
Frequently Asked Questions (FAQ)
Question: Can I use just my camera's built-in flash for a wedding photo booth? Answer: While technically possible, I strongly advise against it. A camera's built-in flash is small, harsh, and directly frontal, leading to flat, unflattering photos with harsh shadows and red-eye. It's the quickest way to create poor quality images. For professional results, you absolutely need an external, diffused light source, whether it's continuous LED lighting or an off-camera flash with a modifier.
Question: What's the best budget-friendly lighting setup for a photo booth? Answer: For budget-friendliness without sacrificing too much quality, I recommend a single, large LED ring light or two small bi-color LED panels (like Neewer or Godox) with mini softboxes, mounted on lightweight stands. These can often be purchased for a few hundred dollars and offer significantly better and more consistent lighting than a bare flash. Pair this with a custom white balance, and you're well on your way to great results.
Question: How do I prevent red-eye in photo booth pictures? Answer: Red-eye is caused by the flash reflecting off the retina of the eye, particularly when the flash is too close to the camera lens. The instant fix is to move your light source off-axis from the camera. Using an off-camera flash or continuous lights positioned to the sides (e.g., at 45-degree angles) will eliminate red-eye because the light isn't entering the eye directly along the lens's axis. Diffusion also helps by softening the light.
Question: What if the venue has terrible power outlets or limited access? Answer: This is a common challenge. Your primary solution should be battery-powered lighting. Invest in continuous LED panels or flashes that run on rechargeable batteries (V-mount, NP-F, or dedicated flash battery packs). For longer events or multiple lights, a portable power station (like a power bank designed for AC appliances) is a lifesaver. Always bring extra fully charged batteries and ensure your power management plan is robust.
Question: Should I use a backdrop that helps with lighting? Answer: Absolutely! A light-colored, matte backdrop (white, light gray, or pastel) will reflect light back onto your subjects, acting as a giant fill card and making your primary light sources more efficient. Avoid dark, shiny, or highly reflective backdrops, which can absorb light or create unwanted glare and reflections. A clean, simple backdrop allows your subjects and their expressions to truly shine.
Key Takeaways and Final Thoughts
Mastering photo booth lighting isn't about having the most expensive gear; it's about understanding the principles of light and applying them strategically. As an experienced industry specialist, I've seen the transformative power of good lighting, turning mundane snapshots into cherished memories.
- Prioritize Soft, Diffused Light: Whether continuous or flash, always aim to make your light source as large and soft as possible.
- Go Off-Camera: Move your light sources away from the camera's axis to add dimension and eliminate red-eye and harsh shadows.
- Control Your Settings: Utilize custom white balance and monitor your histogram to ensure consistent, accurate exposure and color.
- Power Up Smart: Invest in reliable battery solutions and practice impeccable cable management for safety and uninterrupted operation.
- Plan and Test: Pre-event scouting and testing are non-negotiable for preventing surprises and ensuring a flawless execution.
Remember, your photo booth is an extension of your brand's commitment to quality. By implementing these expert strategies, you're not just fixing poor lighting; you're elevating the entire guest experience, delivering professional-grade fun, and ensuring every wedding photo booth picture is a testament to the joy of the day. Go forth, illuminate, and capture those unforgettable smiles!
Recommended Reading
- The Ultimate Guide: What to Consider for a Private Beach Wedding Venue?
- 7 Steps: What to Do When Sustainable Wedding Flower Supply Chains Fail?
- Last-Minute Allergy Changes? 7 Steps to a Safe Wedding Feast
- 5 Critical Steps to Preventing DIY Wedding Favor Failures for High-End Clients
- Unmasking the Culprits: What Chemicals Damage White Gold Wedding Rings?


Comments
Leave a comment below. Your email will not be published. Required fields marked with *