


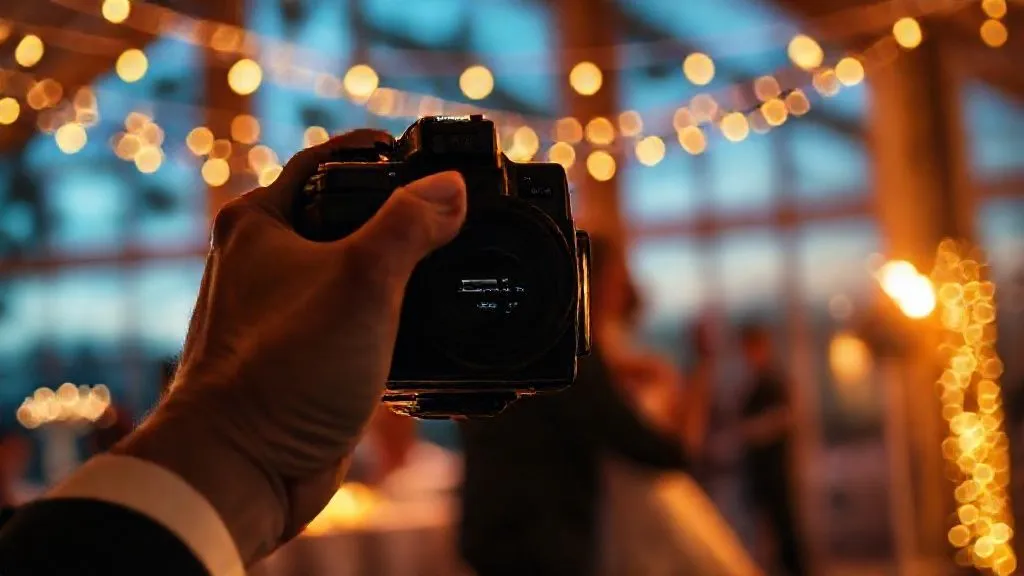
Fixing tricky mixed lighting in wedding reception photos efficiently?
For over 15 years, I’ve navigated the exhilarating, often unpredictable, world of wedding photography. I remember one particularly challenging reception early in my career; the venue was a beautiful old barn, but the lighting was a nightmare: tungsten chandeliers, cool LED uplights, and a sliver of blue twilight streaming through a high window. The resulting images were a chaotic mess of orange, blue, and green color casts. I spent days in post-production, utterly overwhelmed, feeling like I was fighting a losing battle against my own files. That experience taught me a profound lesson: mixed lighting isn't just a technical hurdle; it's a creative challenge that demands both strategic shooting and an efficient, intelligent editing workflow.
This scenario, where multiple conflicting light sources bombard your sensor, is the bane of many wedding photographers. It leads to inconsistent skin tones, distracting color shifts, and images that lack a cohesive aesthetic. The frustration is palpable, and the time wasted in endless slider adjustments can eat into your profit margins and personal life. It’s a problem that can undermine the quality of your work and the efficiency of your business.
But what if I told you there's a systematic approach to conquering this beast? In this definitive guide, I’m going to share my hard-won frameworks, actionable steps, and expert insights that will not only help you understand and anticipate mixed lighting but also equip you with the precise editing techniques to fix tricky mixed lighting in wedding reception photos efficiently. We'll explore everything from on-site prevention to advanced post-processing, ensuring your reception photos are consistently stunning, regardless of the lighting chaos.
Understanding the Root Cause: Why Mixed Lighting is Your Toughest Opponent
Before we dive into solutions, let's dissect the problem. Mixed lighting isn't just 'bad light'; it's a symphony of conflicting color temperatures and intensities. Imagine a scene illuminated by warm tungsten bulbs (around 2700K-3200K), cool fluorescent or LED uplights (often 4000K-6500K), and perhaps ambient daylight or moonlight (varying widely). Your camera's sensor, designed to record light, struggles to interpret these disparate temperatures into a single, cohesive white balance. This results in the dreaded color casts – areas of your image appearing overly warm, too cool, or even green/magenta, all within the same frame.
The challenge isn't just about color, though. Different light sources often have varying intensities and directions, leading to uneven illumination, harsh shadows, and blown-out highlights in different parts of your composition. This complexity demands a shift in mindset: instead of fearing mixed lighting, we must learn to anticipate it and develop a strategic approach to both capturing and correcting it. It's about understanding the physics of light and how it interacts with your camera and subjects.
Pre-Production & On-Site Strategies: Prevention is Your Best Edit
The most efficient way to fix mixed lighting is to minimize its impact before you even open your editing software. This proactive approach saves countless hours in post-production. My mantra has always been: 'Shoot smart, edit less.'
- Bring Your Own Light: Don't rely solely on ambient light. A well-placed off-camera flash or video light can overpower conflicting ambient sources, allowing you to dictate the color temperature and direction of your primary light.
- Use Color Gels Proactively: If you must use flash alongside mixed ambient light, consider gelling your flash. An orange CTO (Color Temperature Orange) gel can warm your flash to match tungsten lights, while a green gel can match fluorescents. This harmonizes your artificial light with the existing ambient, making white balance correction far simpler. Learn more about using color gels effectively.
- Manual White Balance (MWB): Auto White Balance (AWB) struggles with mixed light. Instead, take a custom white balance reading from a neutral gray card or a white object under the *dominant* light source you want to prioritize. This provides a solid baseline for consistent color.
- Expose for the Highlights: In challenging mixed lighting, it’s often safer to slightly underexpose to protect your highlights, especially if there are bright, conflicting light sources. Recovering shadows is generally easier and produces less noise than recovering blown-out highlights.
- Shoot RAW: This is non-negotiable. RAW files contain significantly more data than JPEGs, offering immense flexibility for white balance, exposure, and color adjustments without degradation.

“The most powerful tool in your editing arsenal is a well-captured image. No amount of post-processing can truly fix what wasn't there to begin with.”
The Foundation of Post-Processing: Culling & Initial Adjustments
Once you’re back at your computer, the journey to fixing tricky mixed lighting in wedding reception photos efficiently begins with a disciplined culling process. Don't waste time editing images that are clearly unsalvageable. Be ruthless. Look for sharp focus, pleasing expressions, and compositions that tell a story. Once culled, the initial global adjustments lay the groundwork for more precise corrections.
My typical workflow starts in Adobe Lightroom or Capture One:
- Efficient Culling: Use a rating system (stars, flags) to quickly identify keepers. I often do a pass for technical quality (focus, exposure) and then a second pass for emotional impact and storytelling.
- Basic Exposure Correction: Globally adjust exposure to bring the image into a balanced range. Don't worry about perfect color yet; focus on luminance.
- Highlight & Shadow Recovery: Gently pull back highlights and lift shadows to retrieve detail. Remember, RAW files give you incredible latitude here.
- Apply Lens Corrections: Correct for chromatic aberration and lens distortion. This cleans up the image before color work begins.
- Sync Initial Settings: For a series of photos taken in the same lighting conditions, sync these basic adjustments across the set. This provides a consistent starting point.
| Adjustment Step | Priority | Goal |
|---|---|---|
| Culling | High | Select keepers, eliminate unusable shots |
| Exposure | Medium | Achieve balanced luminance |
| Highlights/Shadows | Medium | Recover detail in extremes |
| Lens Corrections | Low-Medium | Remove optical imperfections |
| Sync Settings | High | Ensure consistency across similar shots |
Mastering White Balance: The Cornerstone of Mixed Lighting Correction
This is where the real magic begins when fixing tricky mixed lighting in wedding reception photos efficiently. White balance is arguably the most critical global adjustment. Even with a custom white balance shot on-site, conflicting light sources can still create problematic color shifts. The goal isn't always 'perfect' neutrality, but rather a pleasing and consistent aesthetic.
- Eyedropper Tool First: Start by using the white balance eyedropper tool on a neutral gray or white area within the image. If you used a gray card, this is your moment. This often gets you 80% of the way there.
- Temperature & Tint Sliders: Fine-tune using the Temperature (blue-yellow) and Tint (green-magenta) sliders. Pay close attention to skin tones; they are your best indicator of correct white balance.
- Dealing with Multiple White Balances: This is the tricky part. If one side of the frame is warm and the other is cool, a global white balance adjustment will only compromise. This is where local adjustments become indispensable.
- Targeted White Balance with Masks: In Lightroom, use the Adjustment Brush or Radial/Graduated Filters to apply specific white balance corrections to different areas. For example, you can cool down a section bathed in warm tungsten light while leaving a cooler area untouched, or vice-versa. This allows you to 'paint in' the correct white balance where it's needed most.

Case Study: The Grand Ballroom's Dual Challenge
I once photographed a wedding in a grand ballroom that had elegant, warm chandeliers (3000K) but also large, cool-toned windows (6000K+) along one wall. My initial global white balance made either the window side too blue or the chandelier side too orange. By applying a custom white balance to the entire image that favored the skin tones under the chandeliers, I then used a large graduated filter over the window side, pulling the temperature slider towards warmer tones and adjusting the tint. This precision allowed me to neutralize the cool window light without affecting the already pleasing warm tones of the interior, creating a harmonious and believable scene that would have been impossible with a single global adjustment. The result was a seamless blend, demonstrating the power of targeted white balance application.
Leveraging Local Adjustments: Precision for Complex Scenes
While global white balance gets you a long way, truly fixing tricky mixed lighting in wedding reception photos efficiently requires surgical precision. Local adjustments are your scalpels. Tools like the Adjustment Brush, Radial Filter, and Graduated Filter in Lightroom (or equivalent tools in Capture One or Photoshop) are incredibly powerful for isolating and correcting specific areas.
- The Adjustment Brush: This is your most versatile tool. Use it to paint over areas with specific color casts. For instance, if a subject's face is hit by a green LED, you can brush over it and apply a magenta tint correction, along with slight temperature adjustments. You can also adjust exposure, contrast, saturation, and clarity locally.
- Radial Filter: Perfect for isolating subjects or specific light sources. If a spotlight creates a hot, color-shifted area around the couple, a radial filter can be applied to that zone to cool it down, desaturate it, or reduce its exposure, all while leaving the rest of the image untouched.
- Graduated Filter: Ideal for correcting lighting that changes across a scene, like a window on one side of the frame. You can drag a graduated filter across the problematic area and apply specific white balance, exposure, or color adjustments that feather off naturally.
- Range Masking: Many modern editing suites offer luminosity or color range masking within local adjustment tools. This allows you to refine your mask further, ensuring your adjustments only affect specific tones or colors within the masked area, preventing spill-over into unintended regions. Explore Adobe's guide on effective local adjustments.

“Think of local adjustments not as corrections, but as painting with light and color, shaping the reality you want to present.”
Color Grading & Tonal Adjustments: Harmonizing the Chaos
Once you’ve tackled the technical white balance and local corrections, it’s time to harmonize the image and infuse it with your unique style. Color grading and tonal adjustments are crucial for bringing cohesion to a mixed-light scene and ensuring your brand's aesthetic shines through. This is where you move beyond 'fixing' and into 'creating.'
- HSL/Color Mixer Panel: The Hue, Saturation, and Luminance (HSL) panel (or Color Mixer in Lightroom) is incredibly powerful for fine-tuning specific colors. If the LED uplights are still casting a slightly too-vibrant blue, you can target just the blue hue, adjust its saturation, or shift its hue slightly. This granular control is essential for neutralizing subtle color casts without affecting other colors.
- Split Toning/Color Grading Panel: This tool allows you to add a specific color tint to the highlights and shadows independently. For mixed lighting, you might add a subtle warm tint to the shadows to counteract cool ambient light, or a cool tint to highlights to balance overly warm practical lights. This can create a beautiful, unified color harmony.
- Tone Curve: The Tone Curve is your ultimate tool for controlling contrast and color across the tonal range. You can use it to deepen blacks, brighten whites, or introduce subtle S-curves for punchy contrast. In mixed lighting, you might use the individual RGB channels within the tone curve to subtly adjust the color balance in specific tonal ranges, for example, adding warmth to the mid-tones without affecting the highlights or shadows.
- Vibrance and Saturation: These global controls should be used judiciously. Vibrance intelligently boosts muted colors while protecting skin tones, making it often preferable to saturation, which can easily overdo all colors.
As renowned photographer Jerry Ghionis often emphasizes, consistency in your color grading helps build a recognizable style. Even with challenging mixed lighting, a consistent approach to color grading can transform disparate elements into a cohesive visual narrative.
Advanced Techniques for Extreme Cases: When Simple Edits Aren't Enough
Sometimes, mixed lighting is so extreme that even the most meticulous local adjustments in Lightroom fall short. This is when you need to bring out the heavy artillery: Photoshop. These techniques are more time-consuming but can salvage images that would otherwise be unusable.
- Advanced Masking in Photoshop: For truly disparate light sources, Photoshop's masking capabilities are unparalleled. You can create precise luminosity masks, color range masks, or even manually paint masks to isolate specific areas. Once isolated, you can apply adjustment layers (e.g., Hue/Saturation, Color Balance, Curves) to correct color and tone without affecting other parts of the image. This allows for complete separation and control.
- Frequency Separation for Skin Tones: Mixed lighting often leads to patchy, inconsistent skin tones. Frequency separation, while traditionally used for skin retouching, can also help smooth out color discrepancies on skin by allowing you to adjust color and tone on a low-frequency layer without affecting the fine textures on the high-frequency layer.
- Blending Multiple Exposures: In very extreme cases, if you bracketed your shots (taking multiple exposures at different settings), you can blend them in Photoshop to combine the best-exposed parts of each. This is particularly useful for scenes with extremely high dynamic range and varied light temperatures.
- Selective Color Adjustment Layer: This powerful Photoshop tool allows you to target specific color ranges (e.g., Reds, Yellows, Blues) and adjust their component CMYK or RGB values. This offers incredibly precise control for fine-tuning color casts within a specific hue. Dive deeper into Photoshop's Selective Color.

Building an Efficient Workflow: Speed, Consistency, and Quality
Efficiency isn't just about speed; it's about achieving consistent, high-quality results in the shortest possible time. When you're fixing tricky mixed lighting in wedding reception photos efficiently, a streamlined workflow is your best friend. It reduces mental fatigue and allows you to deliver galleries faster.
- Develop Custom Presets: Once you've perfected a look for a specific mixed lighting scenario, save it as a preset. This can be a global white balance preset, a local adjustment preset, or a full color grade. Apply these as a starting point for similar images.
- Batch Processing: For images shot under similar conditions, apply your developed presets and then fine-tune. Lightroom's ability to sync settings across multiple images is invaluable here.
- Keyboard Shortcuts: Master your editing software's keyboard shortcuts. Every click saved adds up to hours over a full wedding gallery.
- Dedicated Editing Sessions: Avoid distractions. Dedicate specific blocks of time solely to editing. Focus on one task at a time (e.g., culling, then global adjustments, then local corrections).
- Leverage Smart Previews: In Lightroom, use Smart Previews to edit even when your external hard drive isn't connected, allowing for greater flexibility and faster performance.
- Consider Outsourcing (Strategically): If mixed lighting correction consistently bogs you down, consider outsourcing your culling or basic adjustments to a trusted editor. This frees up your time for advanced creative work and client interaction.
| Workflow Stage | Efficiency Tip | Estimated Time Saved |
|---|---|---|
| Culling & Selection | Use keyboard shortcuts & a clear rating system (e.g., 5-star for keepers) | 20-30% |
| Global Adjustments | Apply custom presets, sync settings across similar images | 30-40% |
| Local Corrections | Master adjustment brush/filters, use range masking | 15-20% |
| Color Grading & Export | Consistent creative presets, batch export settings | 10-15% |
| Overall Strategy | Dedicated editing blocks, consider outsourcing basic tasks | Variable, significant long-term |
According to a survey by The Professional Photographers of America (PPA), efficient post-production workflows are a key differentiator for successful studios, with many reporting that optimized editing processes directly contribute to higher client satisfaction and increased referrals. Explore resources from PPA.
Frequently Asked Questions (FAQ)
Question? Should I always use auto white balance (AWB) on-site, or is manual white balance (MWB) better for mixed lighting?
Detailed answer: For mixed lighting, I strongly advise against relying on AWB. While convenient, AWB attempts to find a single 'average' white balance, which is precisely what fails when you have multiple conflicting light sources. It will often compromise, leading to inconsistent color casts. Manual White Balance (MWB) is always superior. Take a custom reading from a gray card or neutral white object under the dominant light source you wish to prioritize. This gives you a solid, consistent baseline that significantly reduces your editing time. Even better, shoot a custom white balance for each distinct lighting scenario if time permits.
Question? What if the venue lighting is constantly changing, like dynamic LED lights during dancing?
Detailed answer: Dynamic, color-changing LED lights are indeed a nightmare for consistency. In such situations, your best bet is to rely heavily on your own consistent light source – usually an off-camera flash (OCF) or on-camera flash with a modifier – to overpower the ambient light. By using your flash as the primary light, you dictate the color temperature. You can gel your flash to a neutral color temperature (like 5500K for daylight balance) or match it to a less extreme ambient source. If you must incorporate the dynamic ambient, accept that some color variations will occur and focus on making the skin tones as pleasing as possible. Local adjustments will be your best friend for spot-correcting any extreme color shifts after the fact.
Question? How do I handle skin tones consistently when different parts of the image are under warm and cool light sources?
Detailed answer: Skin tones are paramount. When facing mixed lighting, prioritize correcting the skin tones of your main subjects first. Start with a global white balance that makes the skin tones look as natural as possible, even if it makes other areas look slightly off. Then, use local adjustments (Adjustment Brush with temperature/tint adjustments, or even the HSL panel to fine-tune specific skin-tone hues like reds and yellows) to correct any remaining color casts on skin. Remember that skin tones are often a mix of red, orange, and yellow hues. Aim for a healthy, vibrant look rather than a perfectly neutral gray, as neutrality can often look sickly.
Question? Is it better to overexpose or underexpose slightly when shooting in tricky mixed lighting conditions?
Detailed answer: When faced with tricky mixed lighting and high contrast, it's generally safer to slightly underexpose to protect your highlights. Digital cameras tend to retain more detail in the shadow areas than in blown-out highlights. Recovering information from dark shadows is often more successful and results in less visible noise than trying to bring back detail from overexposed, clipped highlights. Always shoot RAW, as this provides the maximum dynamic range for recovery in post-processing. Some photographers even advocate for 'Expose To The Right' (ETTR) to maximize data, but this requires careful monitoring of highlights.
Question? Can AI-powered editing tools help with mixed lighting correction?
Detailed answer: Absolutely, AI is becoming an increasingly powerful ally. Tools like Lightroom's AI masking (Subject Select, Sky Select) can quickly isolate areas for targeted adjustments, significantly speeding up the local correction process. Features like 'Enhance Details' can also improve image quality from noisy RAW files. While AI can't always perfectly interpret complex mixed lighting scenarios on its own, it excels at providing intelligent starting points and automating tedious masking tasks, allowing you to focus on the nuanced, creative decisions that truly fix tricky mixed lighting in wedding reception photos efficiently. It's a fantastic complement to your manual expertise.
Key Takeaways and Final Thoughts
Conquering tricky mixed lighting in wedding reception photos is less about magic and more about a strategic, multi-layered approach. It begins long before you click the shutter and extends through a meticulous, yet efficient, post-production workflow. Remember these critical points:
- Prevention is paramount: Proactively use your own light, gels, and manual white balance on-site.
- Shoot RAW: This is your safety net and your canvas for extensive correction.
- Master White Balance: Start global, then use local adjustments for precision.
- Leverage Local Tools: Brushes, radial filters, and graduated filters are essential for targeted corrections.
- Harmonize with Color Grading: Use HSL and split toning to unify the scene's colors.
- Build an Efficient Workflow: Presets, batch processing, and shortcuts save invaluable time.
- Don't Fear Photoshop: For extreme cases, advanced masking and blending are powerful solutions.
The journey to mastering mixed lighting is continuous, requiring practice, patience, and a willingness to experiment. But by adopting these expert strategies, you'll not only fix tricky mixed lighting in wedding reception photos efficiently but also elevate your entire body of work, delivering consistently stunning images that truly capture the magic of a wedding day, regardless of the lighting challenges. Keep learning, keep practicing, and your clients will thank you for the beautiful, consistent results.
Recommended Reading
- Hate Your Custom Wedding Dress? 7 Expert Steps to Save Your Day
- How to Prevent Cheesy Bachelorette Games: 7 Classy Strategies
- 7 Secrets to Transform Flat Wedding Stories into Emotional Masterpieces
- Craft Perfect Reception Card Wording: 7 Tips for Tricky Guest Lists
- 7 Elegant Ways to Ensure Your Formal Engagement Dress Code is Honored



Comments
Leave a comment below. Your email will not be published. Required fields marked with *