


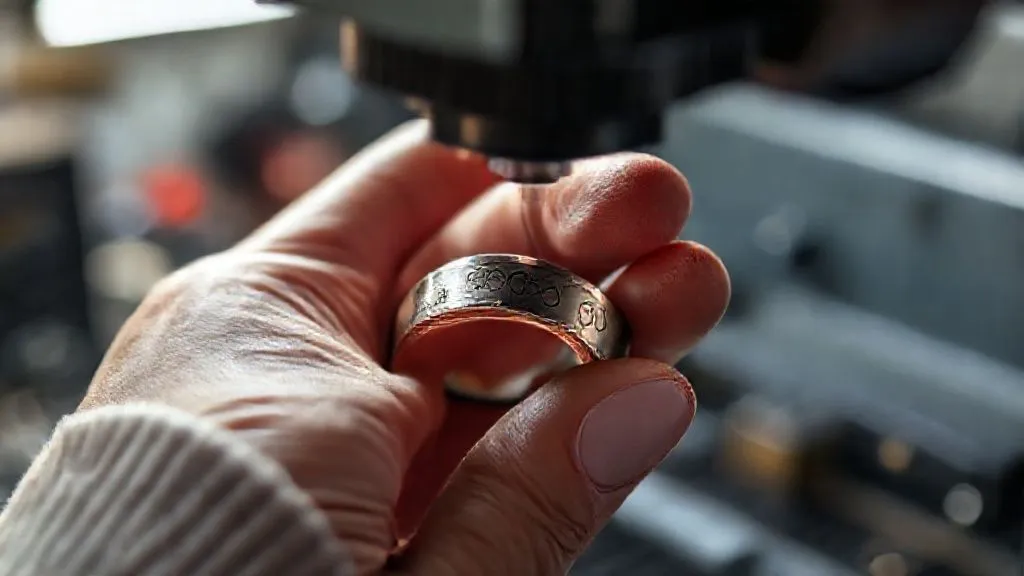
Troubleshooting Common Laser Engraving Errors on Intricate Wedding Bands?
For over two decades in the bespoke jewelry world, I've witnessed the sheer joy a perfectly engraved wedding band brings – and the profound disappointment when a laser engraving goes awry on such a sentimental piece. It’s more than just a mistake; it’s a blemish on a symbol of eternal love, often on a precious metal that offers very little room for error.
The unique challenges of intricate wedding bands – their delicate curves, varying metal hardness, and often microscopic design details – amplify every potential laser engraving flaw. From fuzzy edges to inconsistent depth, these errors can be soul-crushing for both the artisan and the client, especially when working with high-value materials like platinum or rose gold.
In this definitive guide, I’ll share my accumulated expertise, offering a structured, step-by-step framework for diagnosing and rectifying common laser engraving errors on intricate wedding bands. You'll gain actionable insights, proven troubleshooting techniques, and preventative measures to ensure every engraving you produce is a testament to precision and craftsmanship, transforming potential disasters into flawless masterpieces.
Understanding the Unique Challenges of Intricate Wedding Bands
Engraving a simple flat pendant is one thing; tackling the nuanced contours and varied compositions of a wedding band is an entirely different beast. I've spent countless hours perfecting techniques on everything from delicate filigree to robust comfort-fit bands, and the learning curve is steep.
The Delicate Dance of Material and Design
Wedding bands come in a dazzling array of materials, each with its own laser-response characteristics. Gold, platinum, palladium, and even alternative metals like titanium or tungsten react differently to laser energy. A setting that works perfectly for 14K yellow gold might scorch 18K rose gold or barely mark platinum.
Beyond material, the design itself presents significant hurdles. Intricate patterns, tiny fonts, or deep-cut designs on a curved surface demand absolute precision. The laser's focal point must remain consistent across the entire engraving area, a feat that is often easier said than done on a non-flat object.
Expert Insight: "The most common mistake I see isn't a faulty machine, but a misunderstanding of how specific metals interact with laser energy. Each alloy is a unique canvas, demanding tailored settings."
Pre-Engraving Diagnostics: The Foundation of Flawless Work
Before the laser even fires, a significant portion of successful engraving is determined by meticulous preparation. Neglecting these initial steps is like trying to build a skyscraper on a shaky foundation – it’s destined for problems.
Material Purity and Surface Preparation
Even the slightest imperfection on the metal's surface – a microscopic scratch, a tiny speck of dust, or an oily residue – can lead to inconsistent engraving. I always insist on a thorough cleaning process using appropriate jewelry cleaners and lint-free cloths. For highly reflective surfaces, a temporary matte finish or anti-glare coating can sometimes improve laser absorption and prevent scattering.
Vector vs. Raster: Choosing the Right Design File
The type of design file you use is paramount. For crisp lines and sharp text, vector files (like .AI, .SVG, .EPS) are almost always superior. They define paths and shapes mathematically, ensuring scalability and precision. Raster files (.JPG, .PNG) are pixel-based and can lead to fuzzy or pixelated results, especially when scaled or on very small details. Always ensure your vector paths are closed and free of stray nodes.
- Clean the Band: Use an ultrasonic cleaner or specialized jewelry cleaner to remove all oils and debris. Dry thoroughly with a lint-free cloth or compressed air.
- Inspect the Surface: Use a jeweler's loupe (10x magnification or higher) to meticulously check for any surface imperfections, scratches, or hidden porosity that might affect engraving quality.
- Verify Design Integrity: Open your design file in your engraving software. Zoom in to 400% or more to check for broken paths, overlapping lines, or extremely thin vectors that might disappear during engraving.
- Test on Scrap Material: Whenever possible, perform a test engraving on a similar metal type and curvature to fine-tune settings before committing to the actual wedding band.

Calibrating Your Laser: Precision is Paramount
I've seen countless hours wasted because an engraver assumed their machine was perfectly calibrated. Laser engravers are precision instruments, and like any fine tool, they require regular calibration and a deep understanding of their settings to perform optimally, particularly when working with delicate wedding bands.
Focal Length and Beam Alignment
The focal length – the distance between the laser lens and the material – is arguably the most critical setting. Even a fraction of a millimeter off can result in blurry, shallow, or inconsistent engravings. Use a focusing tool or the 'ramp test' to determine the precise focal point for your material and lens. Beam alignment ensures the laser energy is delivered efficiently and uniformly. A misaligned beam can cause power loss, uneven engraving, and even damage to your machine.
Power, Speed, and Frequency Settings: The Golden Triangle
These three settings are intertwined. Power determines the intensity of the laser beam. Too high, and you risk scorching or melting; too low, and the engraving will be faint. Speed dictates how fast the laser head moves. Slower speeds allow more energy to be absorbed, creating deeper marks. Frequency (for pulsed lasers) controls how many pulses per second are delivered. Higher frequencies can create smoother, more consistent lines, especially on intricate details. Experimentation and precise record-keeping are your best friends here. For a deeper dive into laser physics and optimal settings, consider resources from reputable laser manufacturers like Trotec Laser's technical guides.
| Metal Type | Power (%) | Speed (mm/s) | Frequency (kHz) |
|---|---|---|---|
| 14K Yellow Gold | 10-15 | 80-120 | 15-20 |
| 18K Rose Gold | 8-12 | 90-130 | 18-22 |
| Platinum | 20-25 | 60-100 | 10-15 |
| Sterling Silver | 12-18 | 70-110 | 15-20 |
| Titanium | 25-30 | 50-90 | 8-12 |
Identifying and Rectifying Common Engraving Errors
Even with the best preparation, errors can creep in. Knowing how to quickly identify the specific flaw and implement the correct fix is a hallmark of an experienced engraver. Here are some of the most frequent issues I encounter when troubleshooting common laser engraving errors on intricate wedding bands:
Fuzzy Edges and Blurry Text: The Focus Fiasco
This is almost always a focus issue. If the laser beam isn't precisely focused on the material's surface, the energy spreads, resulting in a wider, less defined mark. It can also occur if your lens is dirty or scratched. The solution is to recalibrate your focal length using a reliable method, clean your lens thoroughly with appropriate optical cleaners, and ensure your material is perfectly level and secured.
Inconsistent Depth and Uneven Engraving: Power Fluctuations and Material Response
When some parts of the engraving are deep and others shallow, it suggests inconsistent energy delivery or varying material properties. Check for power fluctuations in your laser's power supply, ensure your laser tube or fiber source is healthy, and verify that the material itself is uniform in composition. On curved surfaces, an improper rotary setup can cause the focal distance to change, leading to uneven depth. You might need to adjust your power settings slightly or slow down the speed to allow for better absorption.
Ghosting and Double Images: Vibration and Alignment Woes
A 'ghost' image, where the engraving appears slightly offset or doubled, is usually a mechanical issue. This can be caused by vibrations in your workbench, loose belts or stepper motors in your engraver, or improper clamping of the wedding band in your rotary attachment. Ensure your machine is on a stable surface, regularly check and tighten mechanical components, and use a secure, custom-fit jig for holding the ring. Sometimes, electromagnetic interference can also cause minor motor stuttering, so check your cabling and grounding.

Advanced Troubleshooting: When Standard Fixes Aren't Enough
Sometimes, the simple fixes don't cut it. This is where experience truly comes into play, requiring a deeper dive into less obvious culprits. When I'm troubleshooting common laser engraving errors on intricate wedding bands that seem resistant to basic adjustments, I expand my diagnostic net.
Environmental Factors: Temperature and Humidity
Believe it or not, the ambient conditions in your workshop can affect laser performance. Extreme temperature fluctuations can impact the stability of your laser tube or optics, leading to power inconsistencies. High humidity can cause condensation on lenses or mirrors, scattering the laser beam. Maintaining a stable, climate-controlled environment (typically 68-75°F and 40-60% humidity) is crucial for optimal machine longevity and consistent engraving results.
Software Glitches and Firmware Updates
Modern laser engravers are complex machines driven by sophisticated software. A corrupted design file, outdated software drivers, or buggy firmware can manifest as engraving errors. Always ensure your engraving software and machine firmware are up-to-date. Regularly back up your settings and consider a clean reinstallation of your software if you suspect a corruption. Check your laser manufacturer's support forums or documentation for known software issues and updates, such as those found on LightBurn Software's official website for common engraving software.
Case Study: Rescuing a Bespoke Platinum Band Engraving
I recall a particularly challenging project involving a bespoke platinum wedding band with an incredibly fine, continuous Celtic knot pattern. The client had supplied a very old, low-resolution raster image, and my initial test on a similar platinum scrap resulted in uneven depth and a noticeable 'ghosting' effect along the knot's edges.
The Problem: Uneven Depth and Ghosting
My first attempt yielded a faint, inconsistent engraving, with some sections almost disappearing and others showing a slight double image. This was a classic case of troubleshooting common laser engraving errors on intricate wedding bands where multiple factors were at play.
The Solution: A Multi-Pronged Approach
- Design File Overhaul: I first recreated the Celtic knot pattern as a clean vector file, ensuring every line was perfectly defined and closed. This immediately sharpened the design.
- Rotary Alignment: Upon closer inspection, my rotary jig had a minuscule amount of play. I tightened all fasteners and added a custom shim to ensure the ring was absolutely rigid and centered, eliminating vibration.
- Micro-Adjustments to Settings: Platinum is notoriously difficult to engrave. I incrementally increased the laser power by 2% and reduced the speed by 5mm/s from my initial test, finding a sweet spot that allowed for deeper, more consistent material removal without scorching.
- Environmental Check: I noticed the workshop temperature had dropped overnight. I ensured the HVAC system brought the room back to a stable 72°F before attempting the final engraving.
The Result: Flawless Precision
The subsequent engraving was flawless – the Celtic knot was crisp, uniform in depth, and perfectly centered, showcasing the intricate detail the client envisioned. This experience reinforced my belief that meticulous troubleshooting, combining software, mechanical, and environmental checks, is the key to mastering intricate engravings.

Post-Engraving Inspection and Refinement
The work isn't truly done until the engraved piece has passed a rigorous quality check. This final stage is just as critical as the initial setup for ensuring perfection, especially when dealing with the fine details of wedding bands.
Magnification and Microscopic Analysis
What looks acceptable to the naked eye can reveal glaring flaws under magnification. I always use a powerful jeweler's loupe (10x or 20x) and often a digital microscope to inspect every millimeter of the engraving. Look for: uneven lines, stray laser marks, residual material, or any signs of scorching. This microscopic scrutiny is vital for identifying subtle imperfections that could otherwise lead to customer dissatisfaction.
Gentle Cleaning and Polishing Techniques
After engraving, there might be minuscule amounts of vaporized material residue around the engraved lines. A very gentle cleaning with a soft brush and an appropriate jewelry cleaning solution can remove this. For precious metals, a light polishing with a non-abrasive cloth can restore the luster without damaging the engraving. Be extremely careful not to over-polish, which can prematurely wear down the engraved details. For best practices in jewelry care and maintenance, consult resources from organizations like the Gemological Institute of America (GIA).
Expert Insight: "A perfect engraving isn't just about the laser's performance; it's about the entire workflow, from design to final polish. Never skip the microscopic inspection."
Maintaining Your Laser Engraver: A Proactive Approach
Preventative maintenance is the silent hero of consistent, high-quality laser engraving. I've learned that a well-maintained machine is a reliable machine, significantly reducing the frequency and severity of engraving errors. Ignoring maintenance is a surefire way to invite troubleshooting headaches.
Regular Cleaning and Component Checks
Dust and debris are the enemies of precision optics. Regularly clean your laser's lenses, mirrors, and exhaust system according to the manufacturer's guidelines. Check belts for tension and wear, lubricate moving parts as recommended, and ensure all electrical connections are secure. A quick visual inspection before each engraving session can catch many potential issues before they become problems.
Preventative Maintenance Schedule
Develop a strict maintenance schedule and stick to it. This isn't just about cleaning; it includes checking for beam alignment, focal calibration, and even monitoring the laser's power output over time. Keeping detailed logs of maintenance activities helps track potential issues and predict when components might need replacement. Proactive replacement of wear-and-tear parts can save you from costly downtime and ruined projects.
| Task | Frequency | Notes |
|---|---|---|
| Lens & Mirror Cleaning | Daily/Weekly (depending on usage) | Use optical-grade wipes & solution only |
| Beam Alignment Check | Monthly/After major movement | Refer to manufacturer's guide |
| Belt Tension & Lubrication | Quarterly | Inspect for wear, apply specified lubricant |
| Exhaust System Clean-out | Monthly | Clear debris from fan and ducts |
| Power Output Calibration | Bi-annually/After tube replacement | Use a power meter for accuracy |

Frequently Asked Questions (FAQ)
Question? What's the most common reason for inconsistent engraving depth on a flat wedding band?
Answer: For flat bands, the most common culprit is often uneven material thickness or an issue with the material not being perfectly level in the engraving bed. If the band isn't absolutely flat or secured correctly, the focal distance can vary slightly across its surface. Other factors include power fluctuations from the laser's power supply or a dying laser tube/fiber source, which can lead to unpredictable energy output. Always ensure your jig holds the piece perfectly level and that your laser's power supply is stable.
Question? Can I fix a slightly misaligned or 'ghosted' engraving on a finished wedding band?
Answer: It's extremely challenging and often not recommended for precious wedding bands. If the misalignment is very minor and the engraving is shallow, a skilled jeweler might be able to lightly polish the surface to reduce the visibility of the 'ghost' image. However, this risks thinning the metal or completely removing the desired engraving. For deeper or more pronounced errors, the only reliable fix is often to laser engrave over the error with a matching pattern to try and obscure it, or in severe cases, to remove material and re-engrave, which should only be done by a highly experienced professional. Prevention is always better than cure here.
Question? How do I prevent scorching or discoloration on delicate metals like rose gold during engraving?
Answer: Scorching on delicate metals like rose gold typically indicates excessive laser power or insufficient speed, causing too much heat to build up. To prevent this, reduce your laser power incrementally and increase your engraving speed. Using a higher frequency (for pulsed lasers) can also help create finer, cleaner marks with less heat input. Ensure proper fume extraction to quickly remove any ablated material and heat. Some engravers also use a 'multi-pass' technique with lower power settings for each pass, building up the engraving gradually.
Question? My laser engraver suddenly stopped engraving with the same power, even though settings haven't changed. What should I check first?
Answer: If your laser's power output has unexpectedly dropped, the first things to check are the cleanliness of your optics (lenses and mirrors), as even a thin film of dust can significantly reduce power. Next, verify your beam alignment; a misaligned beam will lose energy before reaching the focal point. For CO2 lasers, check the health and age of your laser tube. For fiber lasers, inspect the fiber optic cable for kinks or damage. Finally, investigate your laser's power supply unit for any error codes or signs of failure, and confirm your software drivers are up to date.
Question? Are there specific fonts or design styles that are more prone to errors on intricate wedding bands?
Answer: Absolutely. Very thin, highly decorative, or script fonts with intricate flourishes are much more challenging than bolder, sans-serif fonts. The laser beam has a certain kerf (width), and if the font's lines are thinner than this kerf, they can disappear or become distorted. Similarly, designs with extremely tight spacing between elements can 'fill in' during engraving due to heat spread or material ablation. Always choose fonts and designs with sufficient line thickness and spacing to accommodate your laser's capabilities, and prioritize vector graphics for maximum clarity.
Key Takeaways and Final Thoughts
- Preparation is Paramount: Meticulous cleaning, surface inspection, and precise vector file preparation prevent most errors before they begin.
- Master Your Machine: Understand the interplay of power, speed, and frequency, and calibrate your focal length religiously.
- Diagnose Systematically: Learn to identify common errors like fuzzy edges, inconsistent depth, and ghosting, and apply targeted solutions.
- Consider the Environment: Stable temperature and humidity are silent partners in consistent engraving quality.
- Maintain Proactively: Regular cleaning and scheduled checks extend machine life and ensure reliable performance.
- Inspect Rigorously: High-magnification inspection is non-negotiable for intricate work; don't trust the naked eye.
Mastering laser engraving on intricate wedding bands is a journey of continuous learning and refinement. It demands patience, precision, and a deep respect for both the craft and the sentimental value of the pieces you create. By embracing these expert-backed troubleshooting steps and adopting a proactive approach to your workflow, you won't just fix errors; you'll elevate your artistry, consistently delivering the flawless, heartfelt engravings that wedding bands truly deserve.
Recommended Reading
- 5 Pillars: Managing HNW Client Expectations for Couture Bridal Gowns
- Unveiling Unique Groom Attire Options Beyond Suits: Ditch the Traditional!
- The Ultimate Guide: How to Choose Aisle Flowers for Your Dream Outdoor Wedding
- Ultimate Guide: Proper Ceremony Behavior for Wedding Guests
- Client's Luxury Honeymoon Collapsed? 7 Steps to Recovery

Comments
Leave a comment below. Your email will not be published. Required fields marked with *